Here are the instructions for setting up a LEMP stack on a Kamatera server for the purposes of web development. LEMP represents a known web server configuration that is used to host dynamic websites and applications. Here’s a brief overview of each component:
- Linux: The operating system.
- NGINX (pronounced engine X): The web server software.
- MySQL/MariaDB: The database management system.
- PHP/Perl/Python: The programming languages used for server-side scripting.
Prerequisites
There are three prominent ways to get LEMP Stack working.
- Using a prebuilt image
- Using Windows
- Using Ubuntu
Before you begin, ensure you have one of the following sets of software installed on your system:
- Windows 10 or Windows Server
- Linux
Using Kamatera
On the homepage, find the “Login” button located at the top right corner.
-
- Click on the “Login” button.
Enter your registered email address and password in the provided fields.
- After entering your credentials, click the “Log In” button to access your Kamatera account dashboard.
- Once logged in, you will be directed to the main dashboard of your Kamatera account.
- From the left-hand side navigation menu, click on “My Cloud” to view and manage your cloud services.
- Within the “My Cloud” section, go to “Create New Service” button.
Click on the “Create New Service” button to start the process.
- Choose the zone that is closest to your target audience.
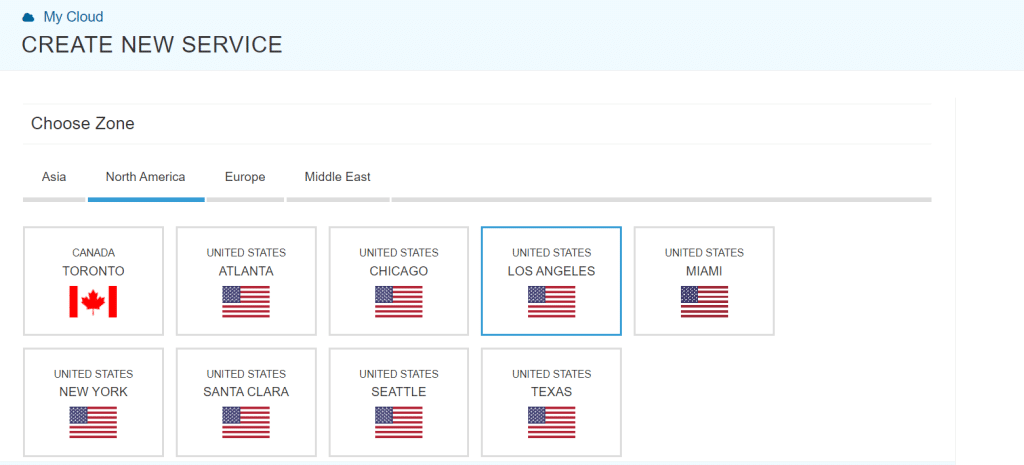
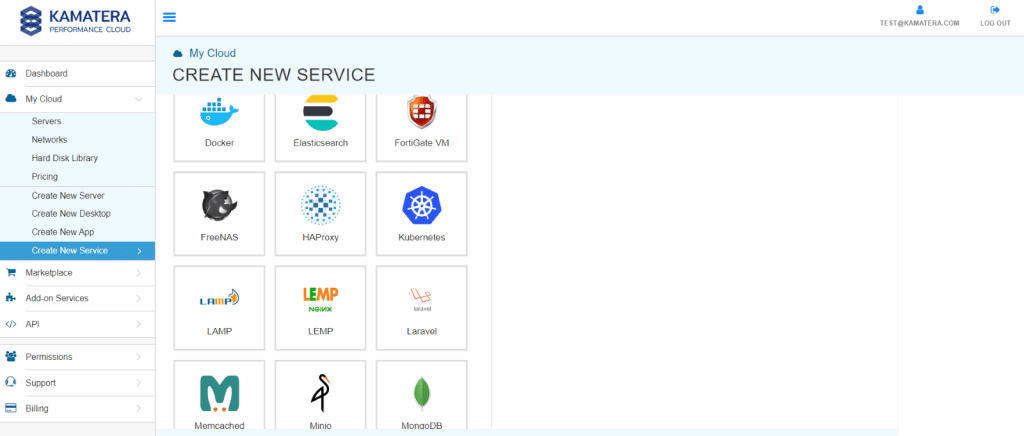
- Choose Service here as shown below.
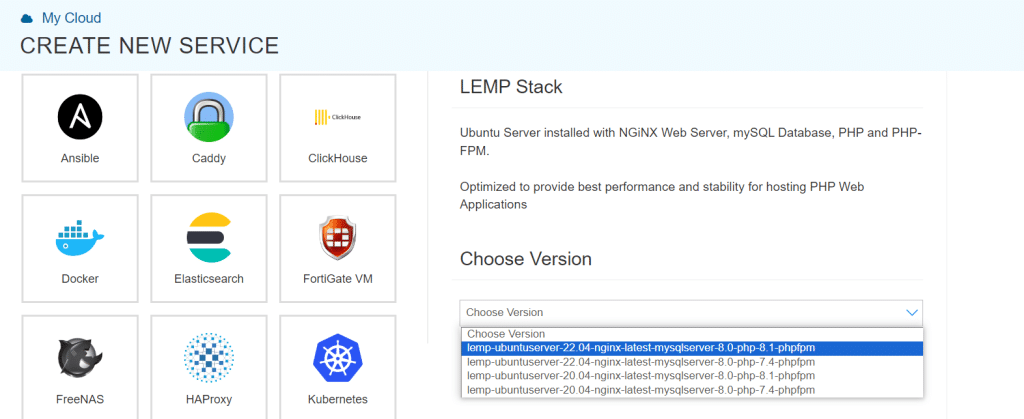
- From the drop-down menu, select the version once you have selected the service.
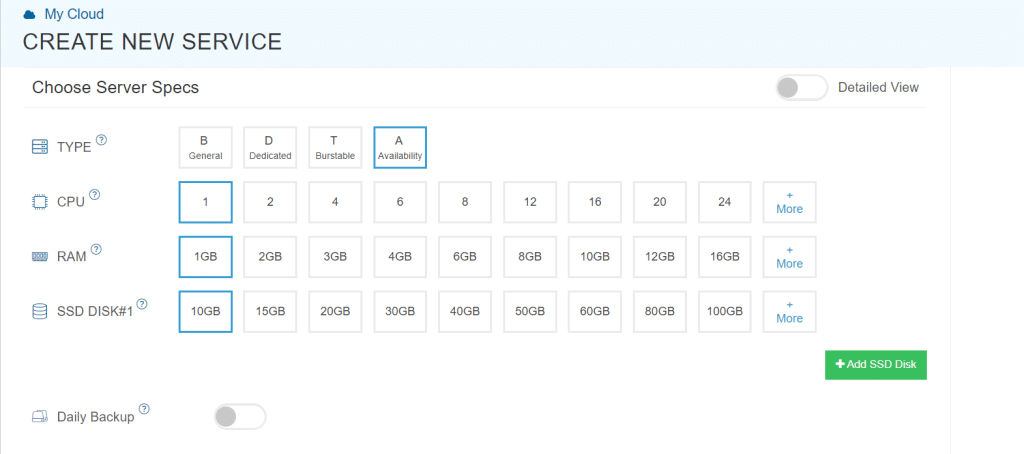
- Choose Server specifications.
Select the Type, CPU, RAM, and NVMe SSD DISK#1, according to your needs.
- Choose Networking as Public Internet Network.

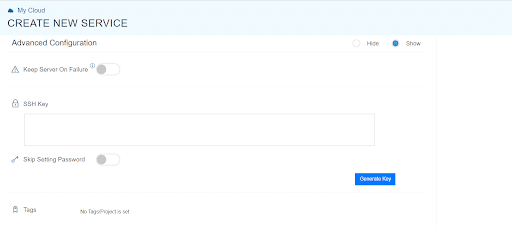

Create a unique password for your server and confirm it by entering it again.
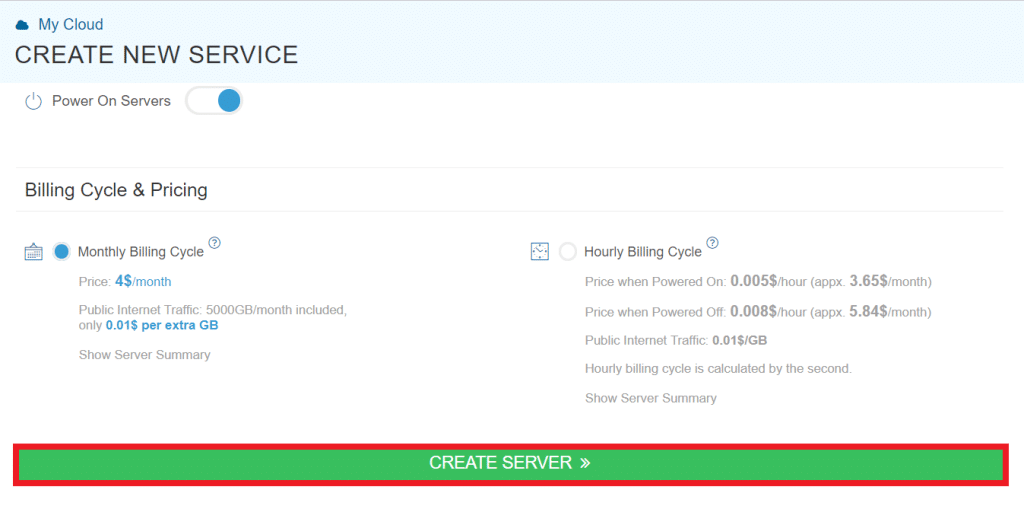
- Click the “Create Server” button to finalize and launch your new virtual machine.
Using Windows
LEMP can be installed on Windows, but it requires a Windows Subsystem for Linux to be installed.
Post successful installation, refer to the following section for using LEMP on Ubuntu.
Using Ubuntu
Step 1: Installing Linux
If you haven’t already, install a Linux distribution like Ubuntu, CentOS, or Debian. For this guide, we’ll use Ubuntu as an example.
Step 2: Update Your Package Manager
- Open a terminal window on your Linux system.
- To ensure you have the latest software, update your package manager by running the following command:
- This will update the list of available packages and upgrade the installed packages to their latest versions.
A LEMP stack is a development framework that comprises four key components: Linux, Nginx, MySQL, and PHP. Below are step-by-step instructions for setting up a LEMP stack on Ubuntu:
*Note: These instructions are tailored for a fresh installation of Ubuntu. Ensure your system is up-to-date by executing the following commands in a terminal:
Step 1: Installing Nginx
Nginx is required for the site visitors to see web pages. Nginx is a high-performance web server that will be installed on ubuntu using apt package manager.
- Open a terminal window by pressing Ctrl + Alt + T.
- Install Nginx by running the following command.
sudo apt install nginx

3. Once the installation is complete, the Nginx web server will start running on your Ubuntu server.
Note: It is suggested to allow connections to Nginx. For that, the most restrictive application profile allowing the traffic shall be enabled. For example, enable the HTTP traffic on port 80 by running the following:
Sudo ufw allow ‘Nginx HTTP’
4. To verify that Nginx is working properly, open a web browser and enter your server’s IP address or “http://localhost” if you’re setting this up on your local machine. You should see the default Nginx welcome page.
Step 2: Install MySQL
With a web server set up successfully, a database system needs to be installed for storing and managing site data. MySQL is one such popular and effective database management system used alongside the PHP ecosystem.
1. Install MySQL by executing the following command.
sudo apt install mysql-server

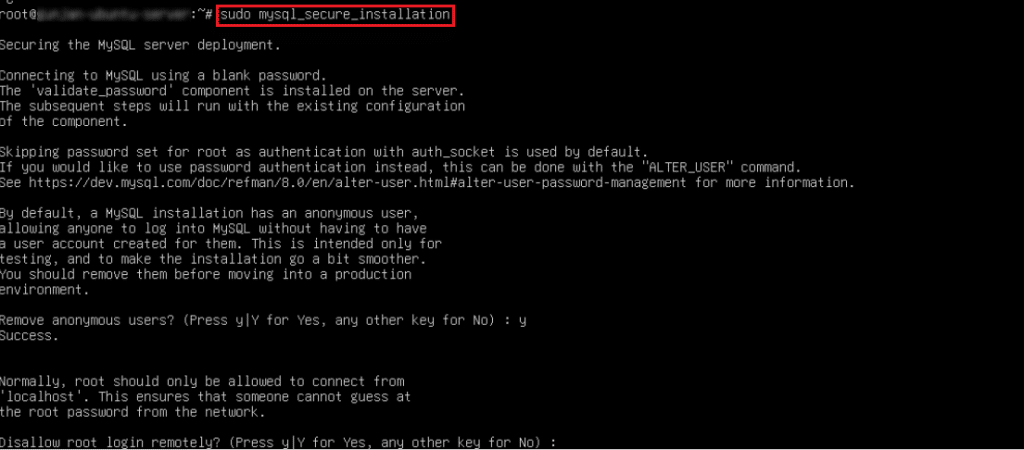
Step 3: Install PHP
With Nginx and MySQL installed to host, store and manage the data for your site, PHP is to be installed to serve the code and generate dynamic content for the web server.
- Install PHP and some common extensions by executing the following command.
sudo apt install php8.1-fpm php-mysql

Step 4: Testing MySQL and PHP
You can create a simple PHP script to test the connection to MySQL by following these steps.
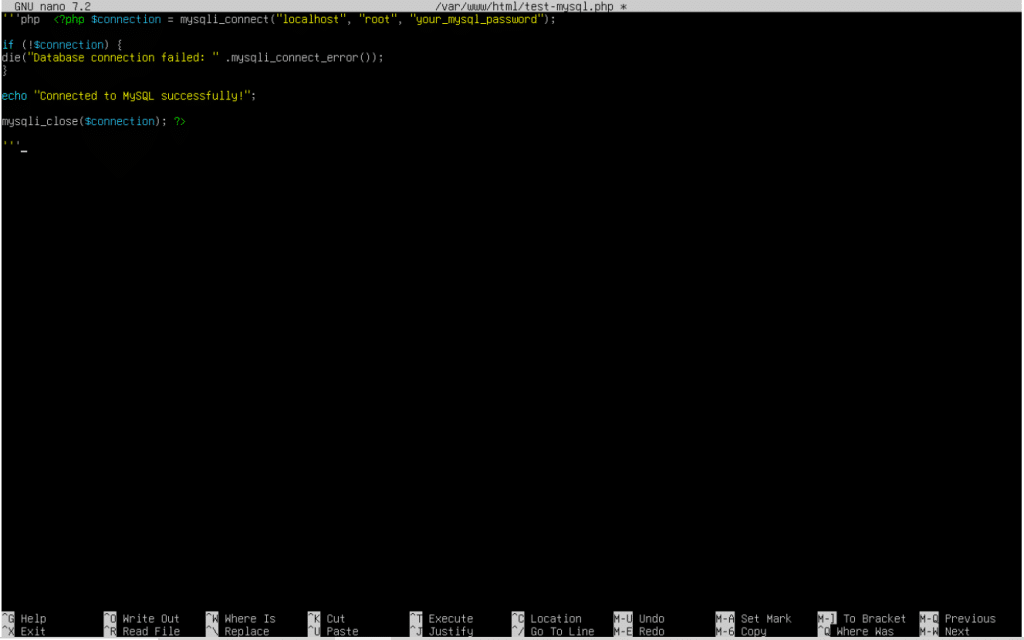
- Create a test PHP file by executing the following command.
sudo nano /var/www/html/test-mysql.php
- Add the following PHP code to the file and save it.
```php    <?php    $connection = mysqli_connect("localhost", "root", "your_mysql_password");

if (!$connection) {

die("Database connection failed: " . mysqli_connect_error());

}

echo "Connected to MySQL successfully!";

mysqli_close($connection);    ?>

```
-
- Replace ”your_mysql_password” with the root password you set during the MySQL installation in the PHP code.
- Open your web browser and navigate to “http://localhost/test-mysql.php” (or your server’s IP address). You should see a message indicating a successful MySQL connection displayed in the browser.
You’ve successfully installed a LEMP stack on your Ubuntu system. You are now ready to start building and hosting web applications on your server.
