DNS records are responsible for directing internet traffic to email systems, servers, and websites. DNS record management is a crucial aspect of maintaining domains on the Internet. With a DNS management system, you can ensure that your domain is correctly configured for seamless functionality.
This step-by-step guide provides an overview of how to create and manage DNS records. It also covers record types such as TXT, A, CNAME, MX, and others, for adding your domain, updating nameservers, and testing your configurations. Use our instructions to optimize your domain’s performance and maintain its reliability across various services.
Creating and managing DNS records in Windows Server 2022 involves using DNS Manager tool or PowerShell.
If DNS Manager tool is not already installed, then use the following process:
Creating your DNS server
- Open Server Manager from start menu.
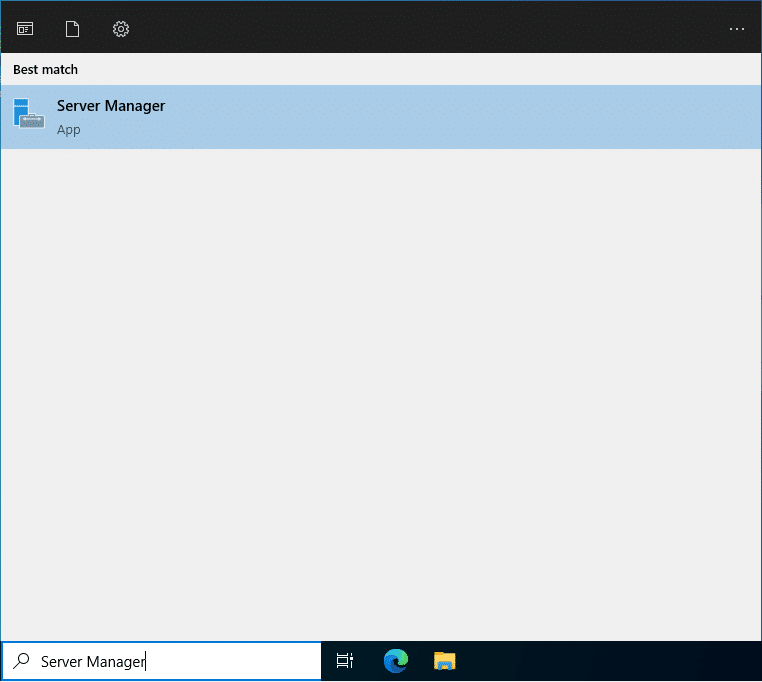
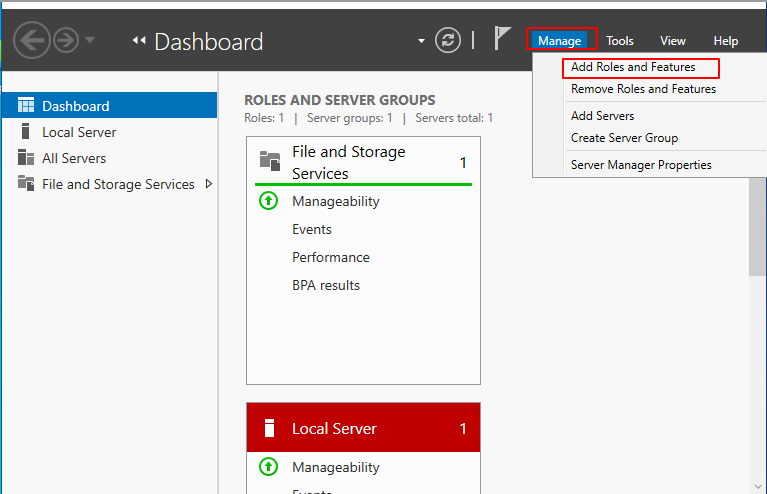
2. Click Manage->Add Roles and Features.
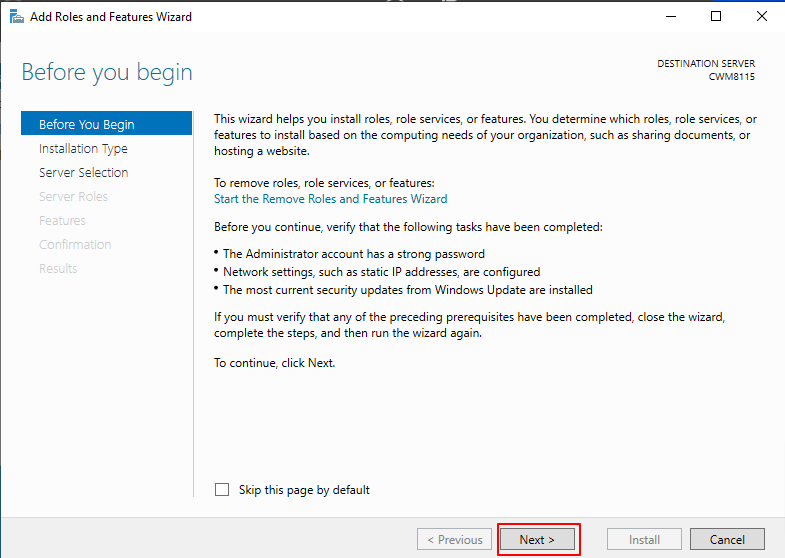
3. In the Add Roles and Features wizard, click Next.
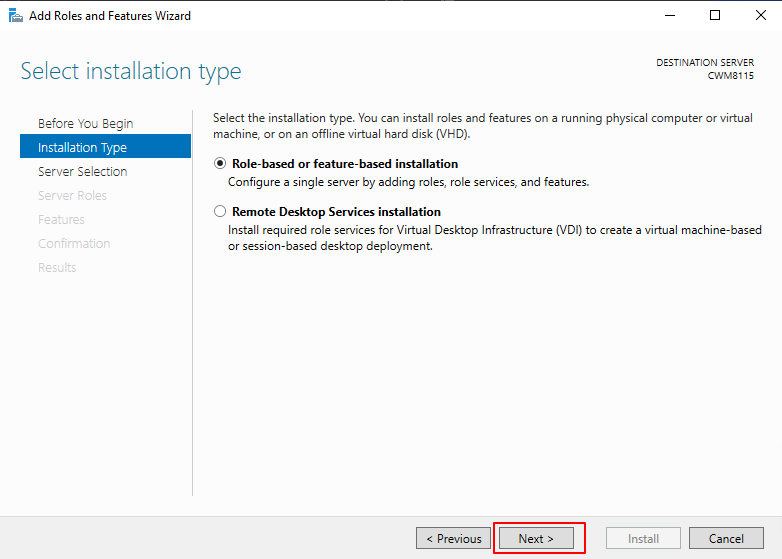
4. Select Role-based or feature-based installation. Click Next.
5. Select your server from the server pool. Click Next.
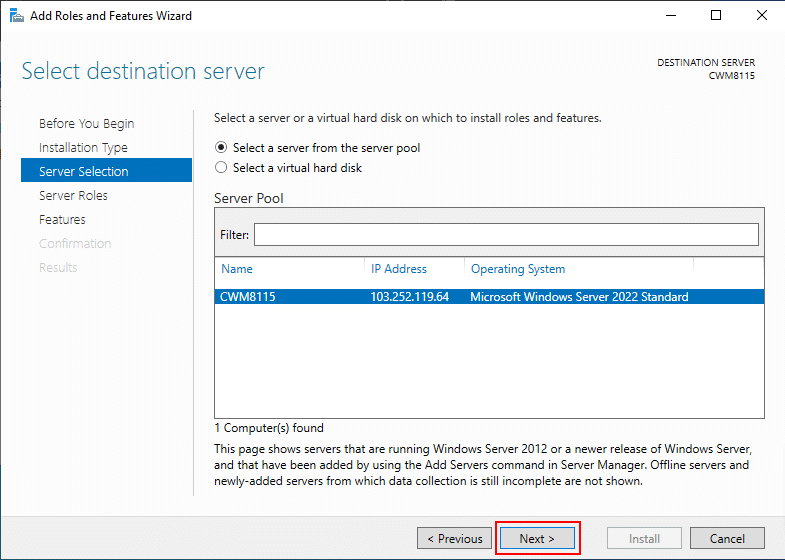
6. Check the box next to DNS Server under Server Roles.
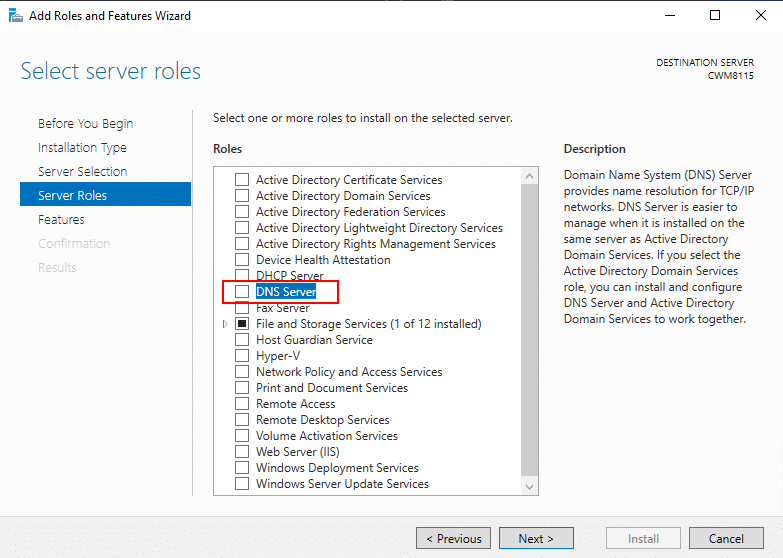
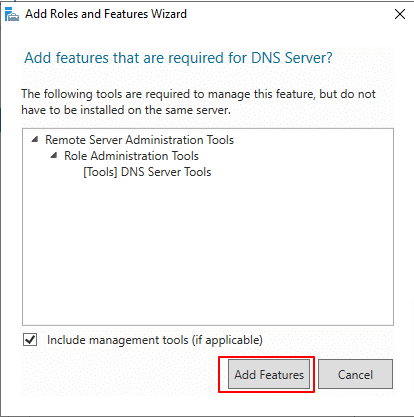
7. In the new pop-up window, check the box next to Include Management Tools (if applicable). Click Add Features.
8. Click Next.
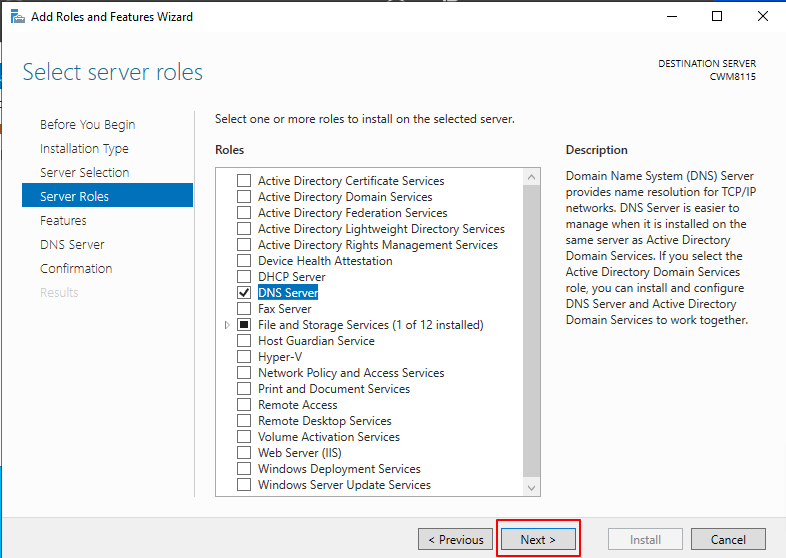
9. Click Next under Select Features.
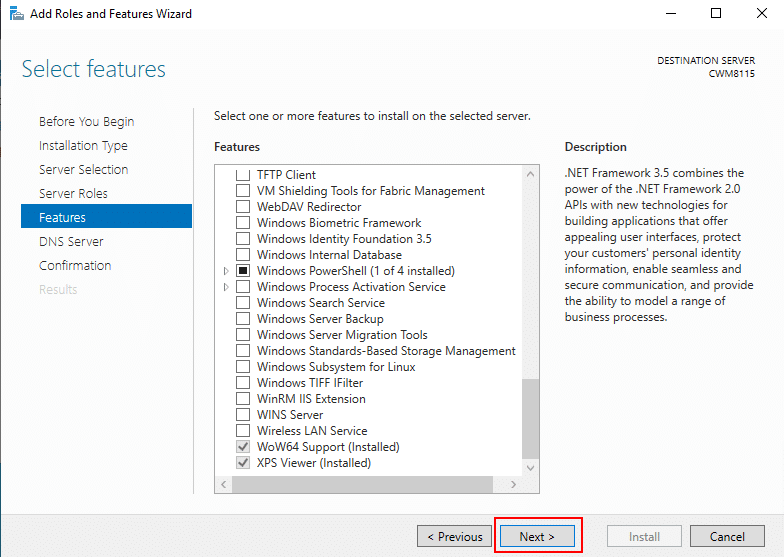
10. Click Next under DNS server.
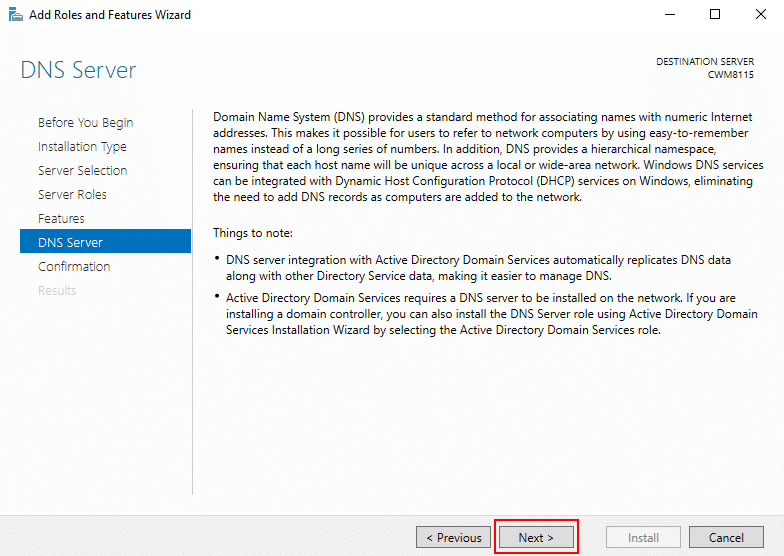
11. Click Install.
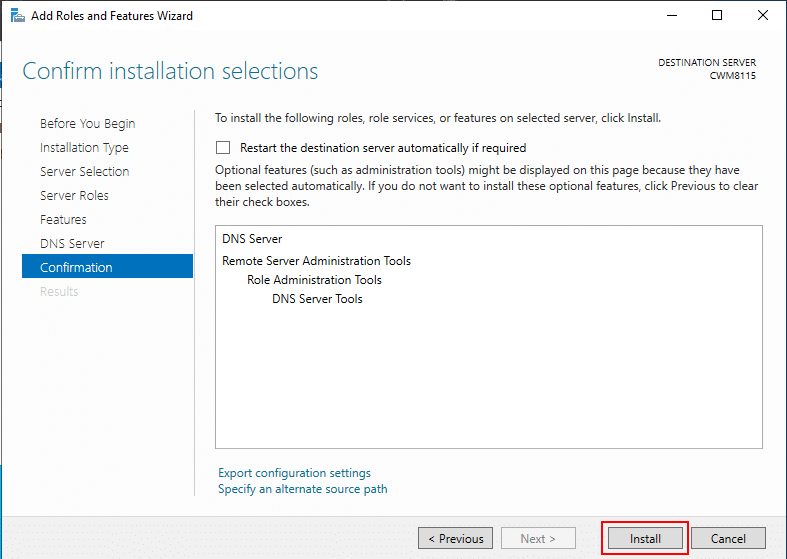
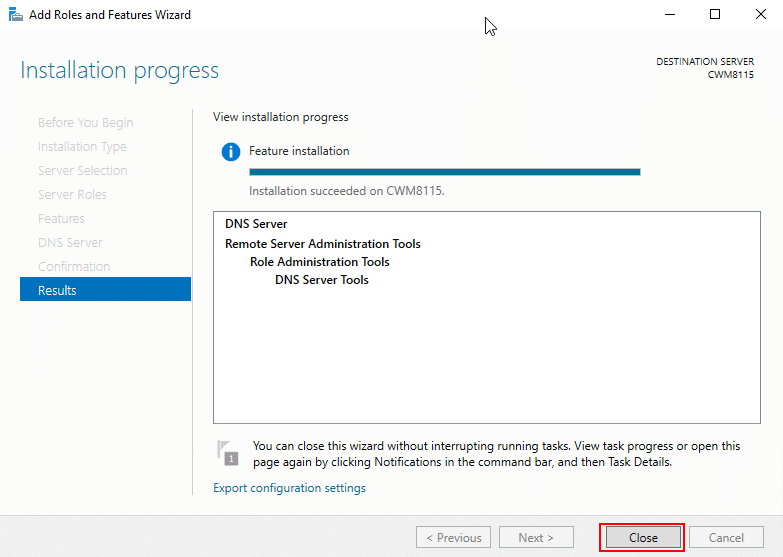
12. Once the installation is complete, click Close.
Restart the server to ensure the role is configured correctly.
Configuring your DNS server
13. From the left pane, select DNS in Server Manager.
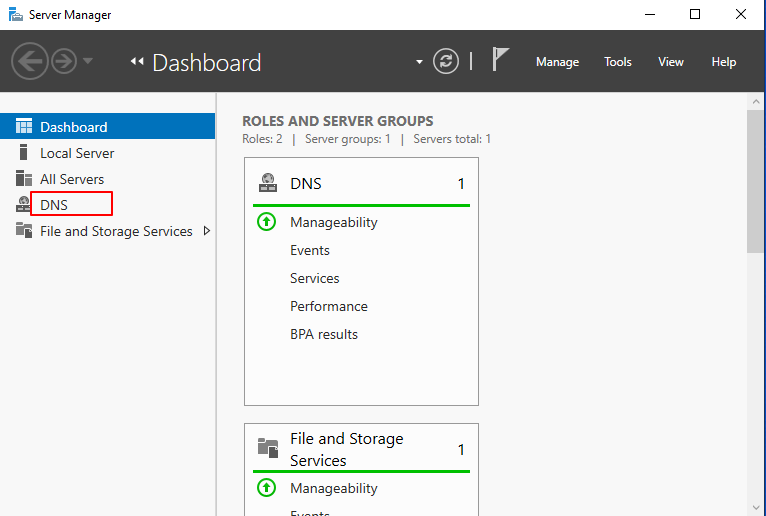
14. Select your server. Right-click on the server and choose DNS Manager from the drop-down menu.
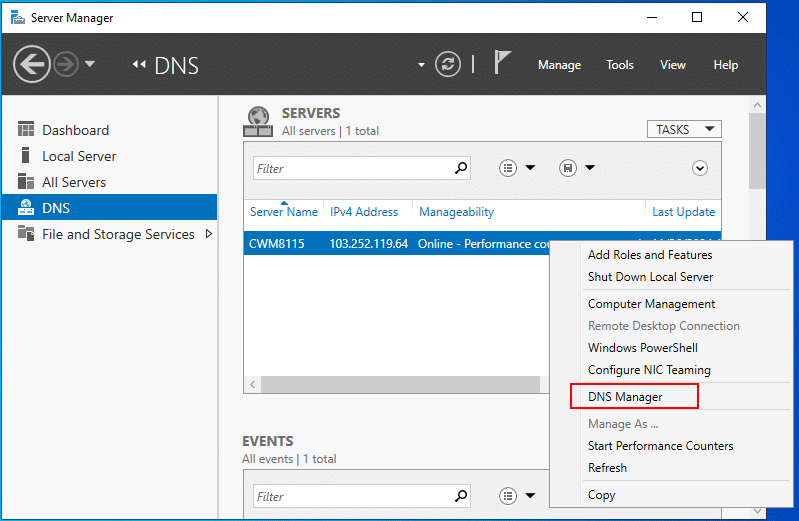
15. A DNS Manager pop-up window opens. Click on the server’s name.
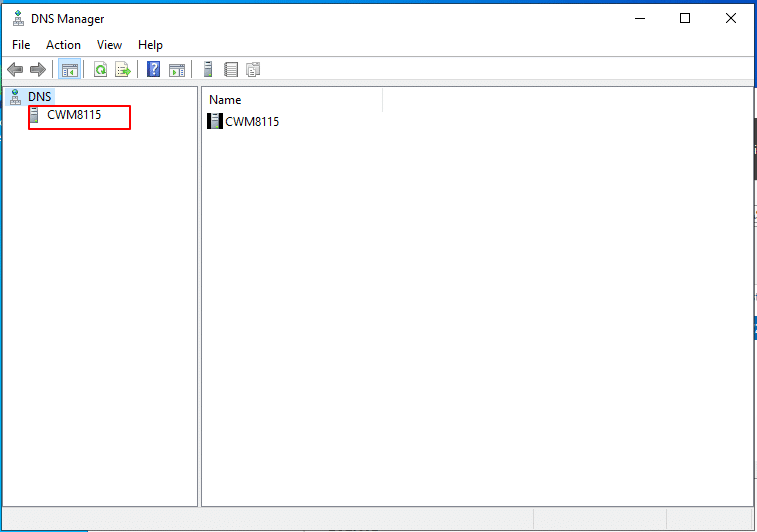
Managing DNS Records
16. When you are in the DNS Manager console, expand the name of your DNS server to view the Forward Lookup Zones and Reverse Lookup Zones.
Forward Lookup Zones: Forward Lookup Zones are used to resolve domain names to IP addresses. (For example, www.example.com -> 127.0.0.1). Records used are A, AAAA, CNAME, and MX. It is useful for accessing websites using human-readable names.
Reverse Lookup Zones: Reverse Lookup zones are used to map IP addresses to domain names (for example: 127.0.0.1 -> www.example.com). Records used are PTR (Pointer) records. They are used for logging and troubleshooting.
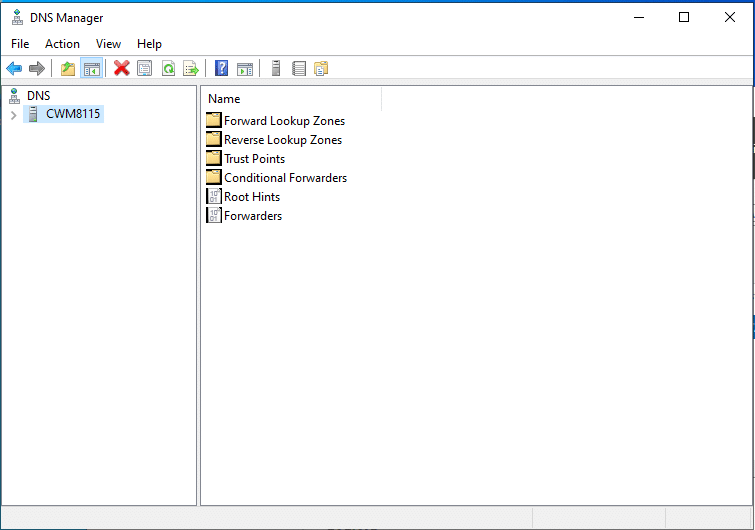
17. If you want to create a new zone, select Forward Lookup Zone or Reverse Lookup Zone.
From the Action menu on the top, Select New Zone (default).
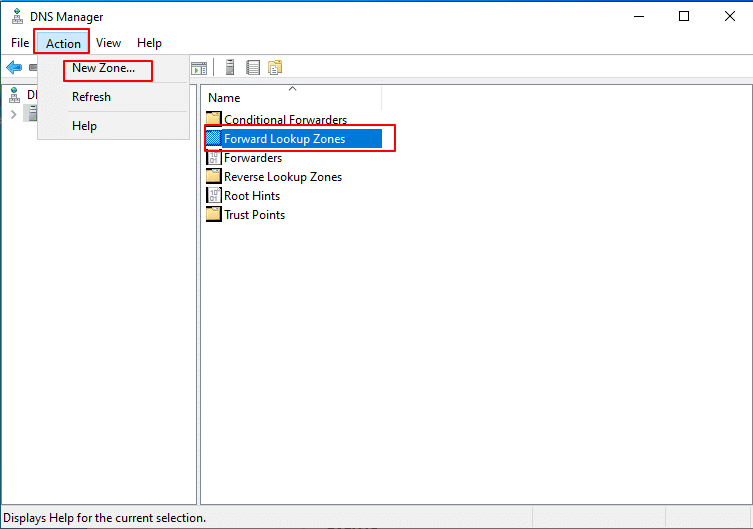
18. The New Zone Wizard pop-up window will open. Click Next.
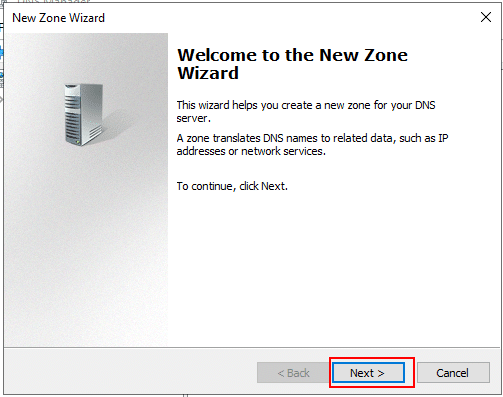
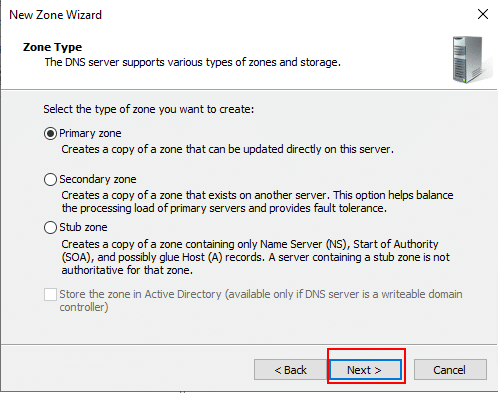
19. Select the Primary zone (default). Click Next.
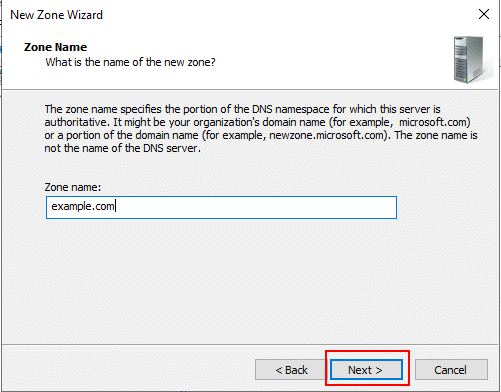
20. Specify a zone name (ie, example.com). Click Next.
21. Select Create a new file with this file name (when you are a new user or in doubt). Click Next.
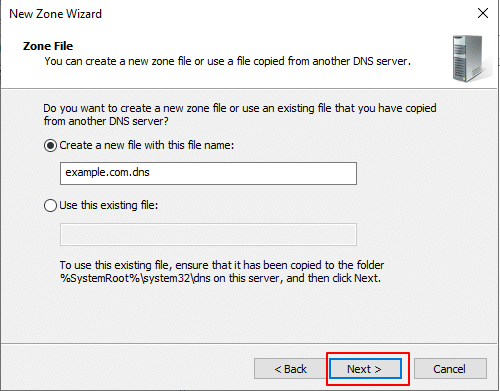
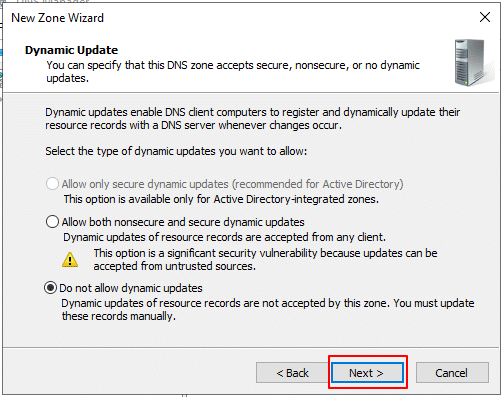
22. Select Do not allow dynamic updates (if you want to update them manually). Otherwise, you can select Allow both nonsecure and secure dynamic updates.
Click Next.
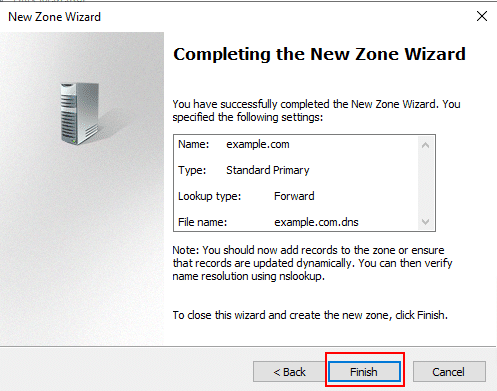
23. Once the New Zone Wizard is completed, you will see the settings that you specified. Click Finish.
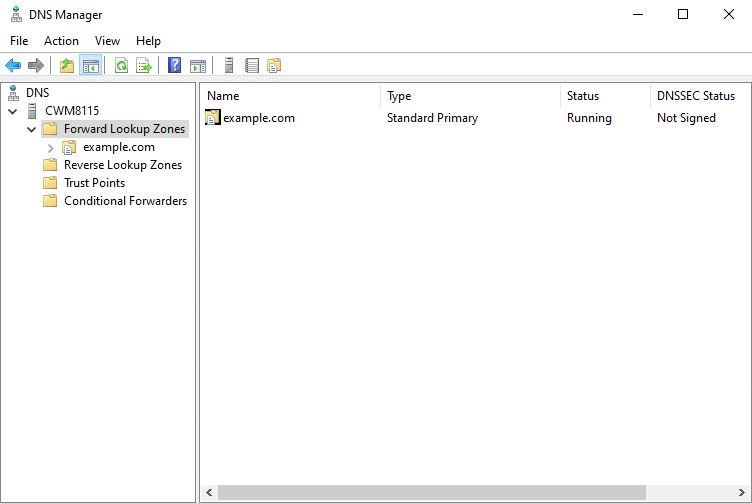
24. Once the zone creation is finished, it will be reflected in the middle pane, as shown in the screen below.
Similarly, select Reverse Lookup Zone, from Action menu on the top, select New Zone and follow the same steps mentioned above.
25. After creating a zone, add new records by navigating to your zone under Forward/Reverse lookup zones.
Right-click on the zone and select New Host (A or AAAA).
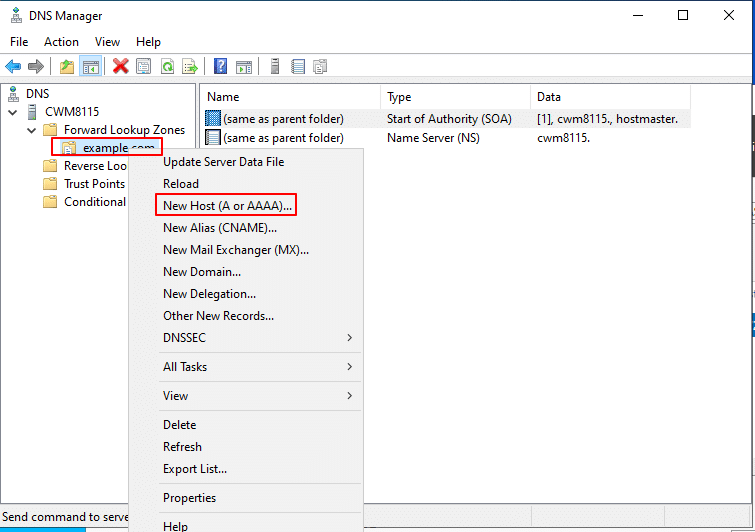
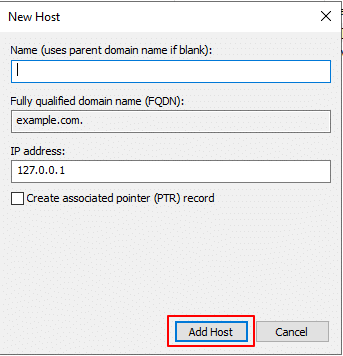
26. New Host (A or AAAA) is used for mapping a domain to an IP address.
In the New Host (A or AAAA) pop-up window,
- Enter the name (If you have sub domains, you can add it here).
- Specify the IP address (127.0.0.1). If you don’t have a real IP address to associate with the domain, you can use a place holder like 127.0.0.1 (used for testing purposes on your local machine).
- Click Add Host.
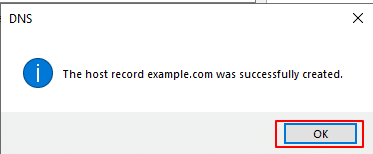
27. You will get a message saying, “The host record example.com was successfully created.” Click OK.
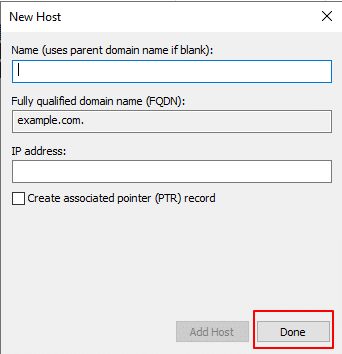
28. If you want to add more records, you can do that here. Otherwise click Done.
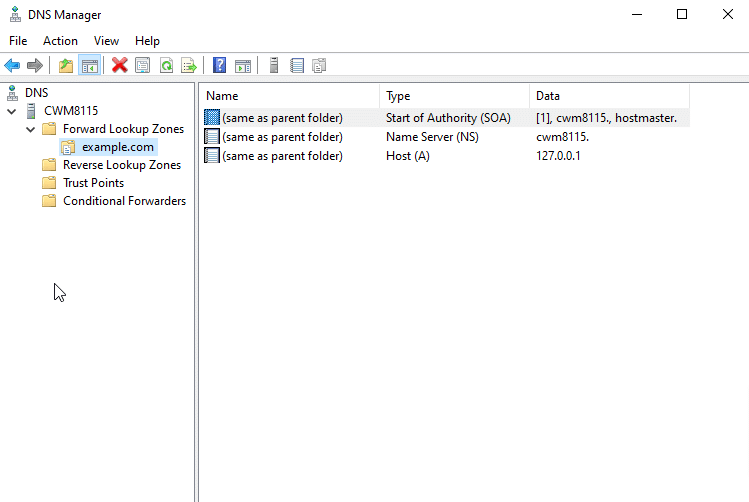
29. You will see that the New Host is reflected in the middle pane, as shown in the screen below.
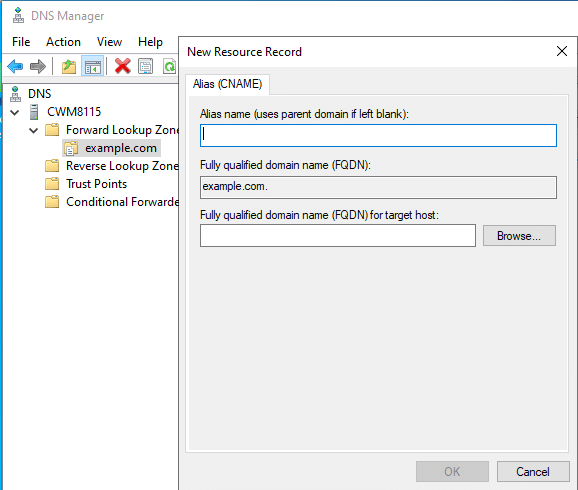
30. Similarly, right-click on the zone (ie, example.com) and select New Alias (CNAME). This is used for creating an alias for another record.
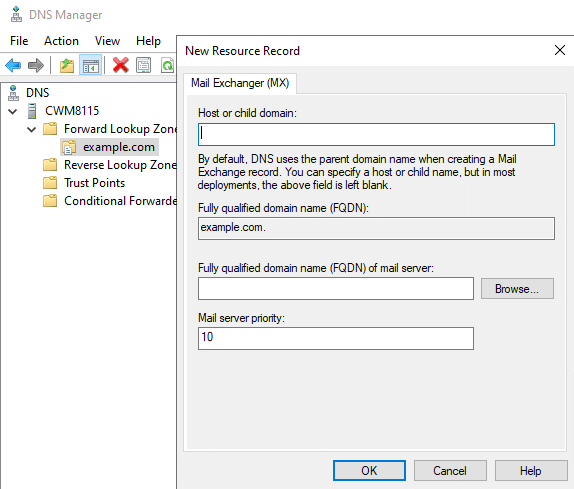
31. Similarly, right-click on the zone (ie, example.com) and select New Mail Exchanger (MX). This is used for email server routing.
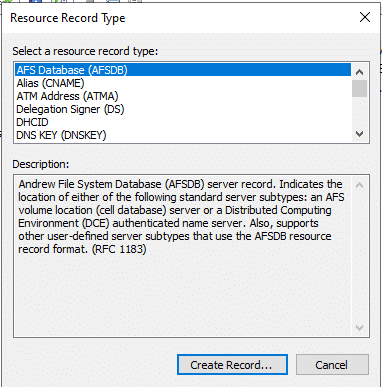
32. Similarly, right-click on the zone (ie, example.com) and select Other New Records. This is used for specialized record types like TXT, SRV, etc.
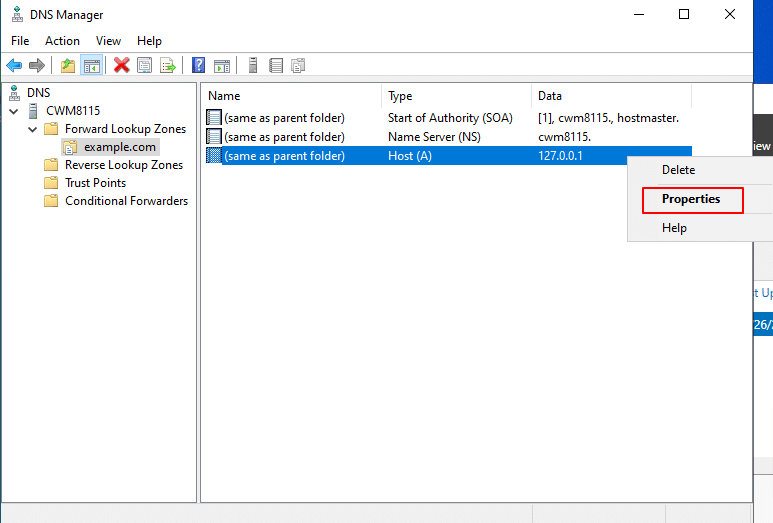
33. To edit records, right-click on the record and select Properties to modify it.
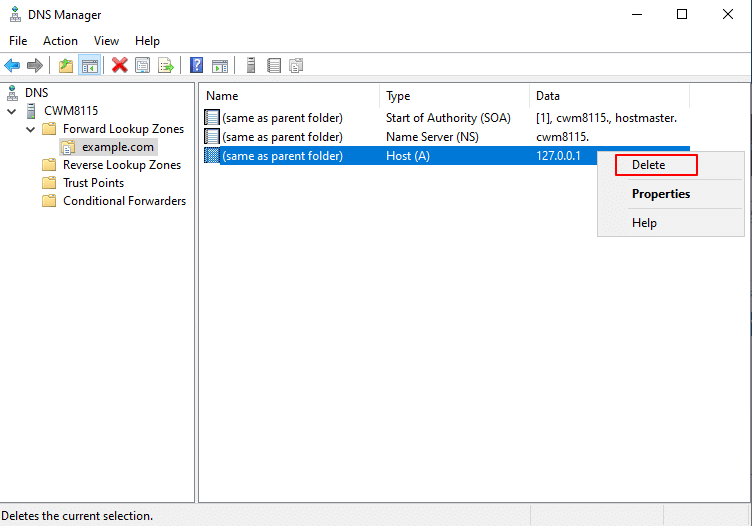
34. To delete a record, right-click on the record and click Delete.
35. Using PowerShell for DNS Management.
PowerShell is an alternative tool to DNS Manager. Below are the common commands to add, delete, edit, and view record.
In the start menu, type Windows PowerShell and select Run as Administrator.
- To add an A record, run the below command:
Command:
Add-DnsServerResourceRecordA -Name "www" -ZoneName "example.com" -IPv4Address "192.168.1.10"
- To add a CNAME record:
Command:
Add-DnsServerResourceRecordCName -Name "alias" -ZoneName "example.com" -HostNameAlias www.example.com
- To view records in a zone:
Command:
Get-DnsServerResourceRecord -ZoneName "example.com"
- To remove a record:
Command:
Remove-DnsServerResourceRecord -ZoneName "example.com" -Name "www" -Force

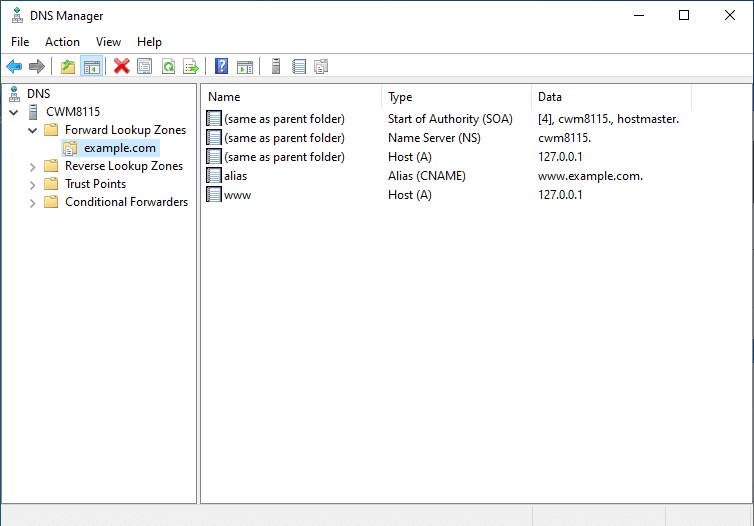
36. In the DNS Manager window, you will see the records that are added in the Windows PowerShell are reflected in the middle pane (alias, www).
37. To test DNS configuration, use nslookup.
Open the command prompt and run the below command:
Command:
nslookup example.com
Note: Replace example.com with your Zone name.
The output you’re seeing indicates that your computer is using Google’s public DNS server (8.8.8.8) for DNS queries. This is not unusual if your network or system is configured to use Google’s DNS instead of your local DNS server.

38. To ensure your query checks your DNS records (ie, example.com), you need to point nslookup to your local DNS server.
Command:
nslookup example.com <local-DNS-IP>
Now, you will see the Server, Address, Name, and Address.

And that’s it! You have now learned how to create and manage DNS records on a Kamatera server.
