PhpMyAdmin is an open-source, web-based database management tool intended to handle the administration of MySQL and MariaDB over the web. It provides a user-friendly interface that allows developers, system administrators, and website owners to manage databases, tables, columns, users, and permissions without using complex SQL commands. Here is a simple guide on managing your databases using phpMyAdmin on your Kamatera cloud server.
Prerequisites
Here are some of the requirements to install phpMyAdmin on your web server:
- Webserver: You’ll need a web server such as Apache or Nginx to install phpMyAdmin.
- PHP: You will need a version of PHP. Any version of PHP 7.2.5 or later will be sufficient to install the latest version of phpMyAdmin.
- MySQL/MariaDB Database: phpMyAdmin supports MySQL compatible databases (MySQL version 5.5 or newer and MariaDB version 5.5 or newer).
- Web Browser: phpMyAdmin is an application which runs in a browser, so you will also need a web browser of your choice. Cookies and JavaScript should be enabled in the browse.
First, let’s create an account on Kamatera:
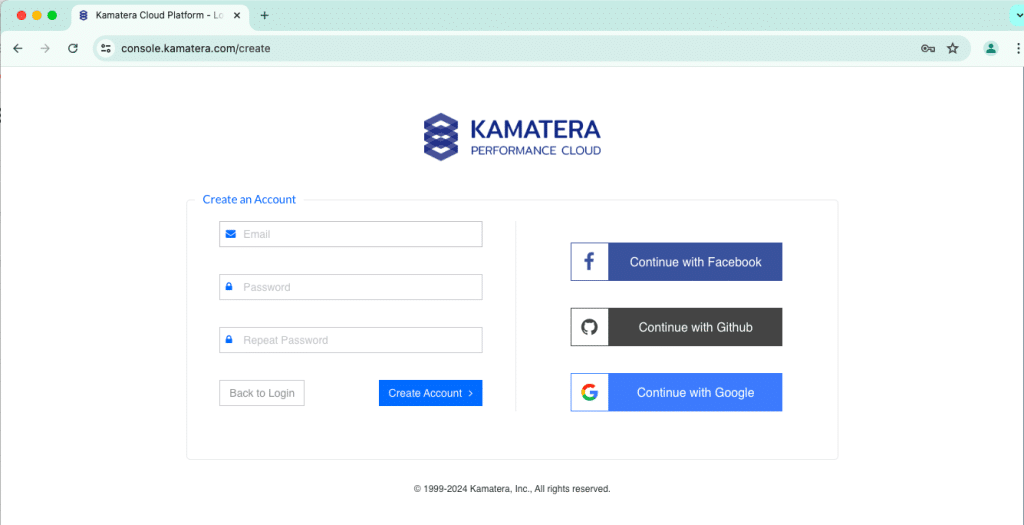
Go to console.kamatera.com and sign up for an account by providing the following information:
- Verify Your Email: Click the verification link sent to your email by Kamatera.
- Password: Enter your password.
- Repeat Password: Re-enter your password and click Create Account.
Access the Kamatera Management Console
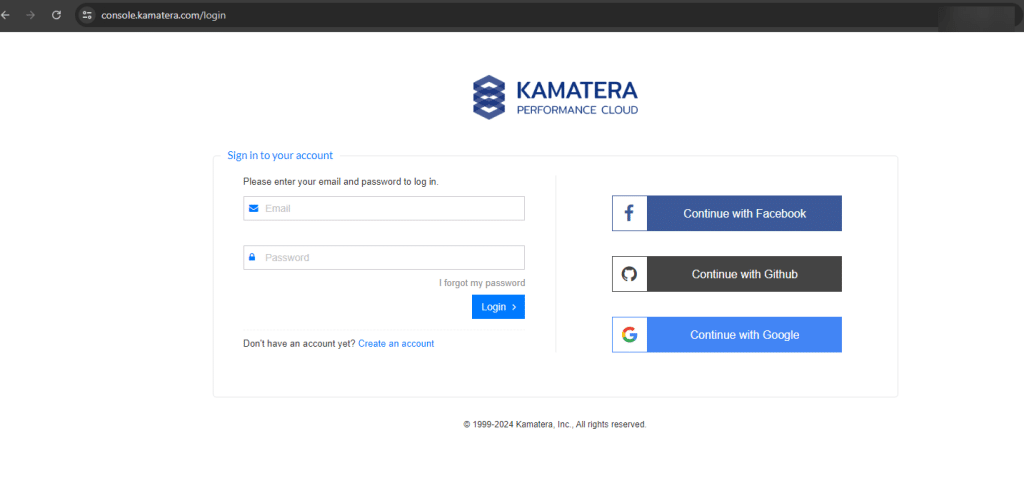
- Enter your credentials to access the Kamatera management console and click Login.
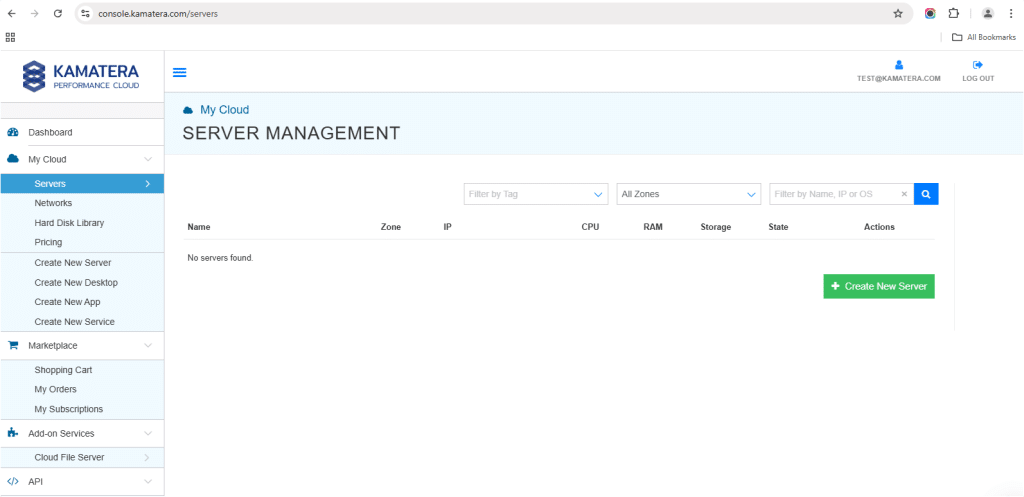
2. Navigate to My Cloud on left-hand side and select Servers.
On the left-hand side navigation menu, click on Create New Server or use the Create New Server option on the right-hand side.
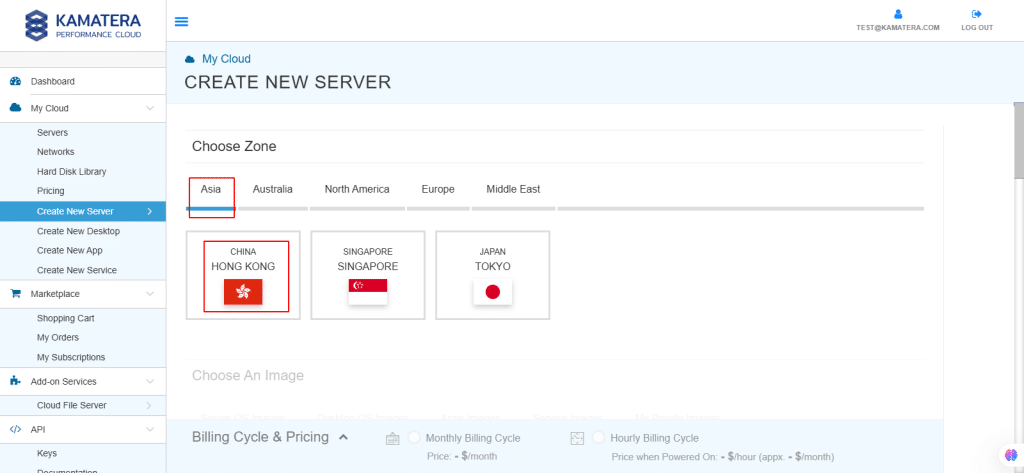
3. Choose Zone
Choose the zone from the following options:
- Asia
- North America
- Europe
- Middle East
Depending on the zone you select, the available countries will be displayed.
Use case: For this setup, we used the Asia server domain to set up the Windows server.
4. Choose an image
Kamatera offers a variety of app and server images to help users set up preconfigured resources. Users can explore options such as:
- Server OS Images
- Desktop OS Images
- App Images
- Service Images
- My Private Images
For this instance, we will choose Server OS Images and select Windows Server.
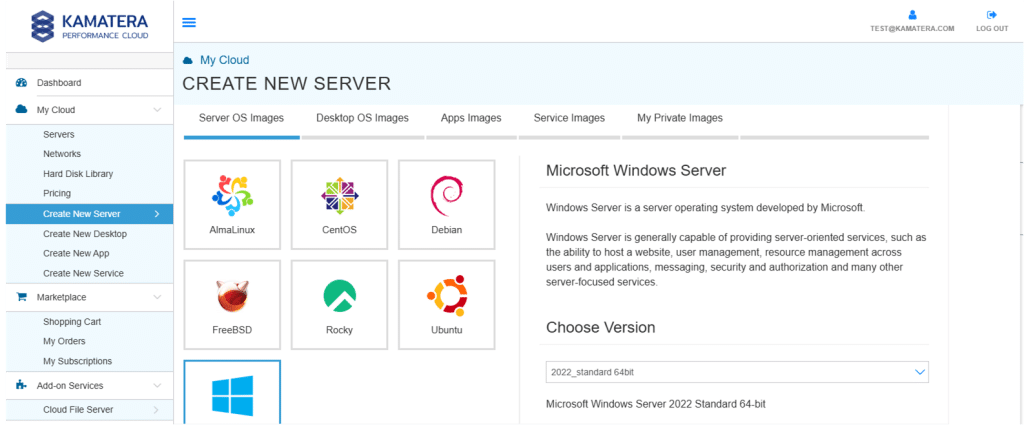
5. In Choose Version, select the latest version of Microsoft Windows Server (2022_standard 64-bit).
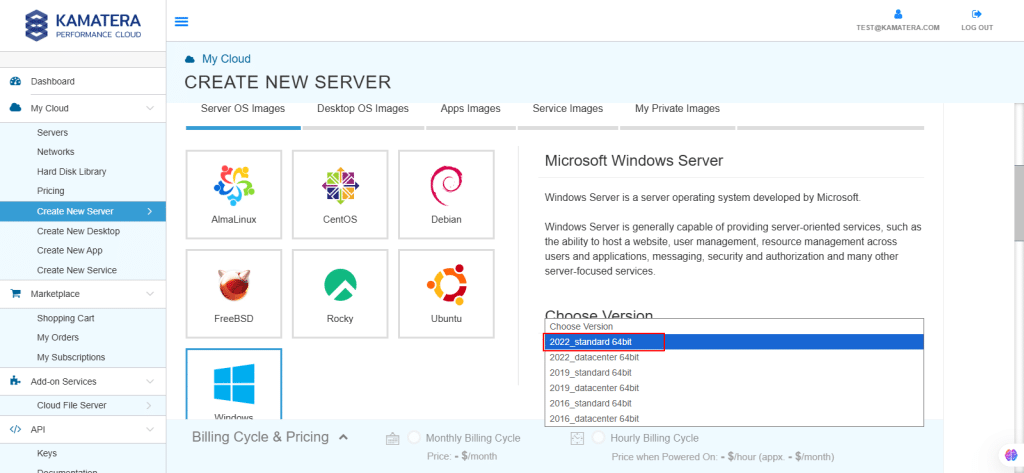
Upon selecting the version, the license prices are displayed.
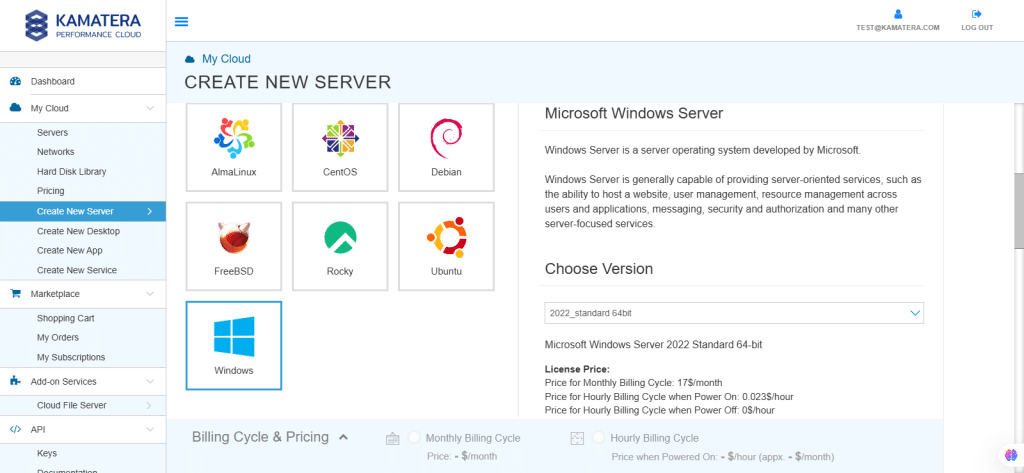
6. Toggle the Detailed view button enable to view the detailed description, including the price.
For this use case, below server specifications are selected. You can configure it according to your requirements.
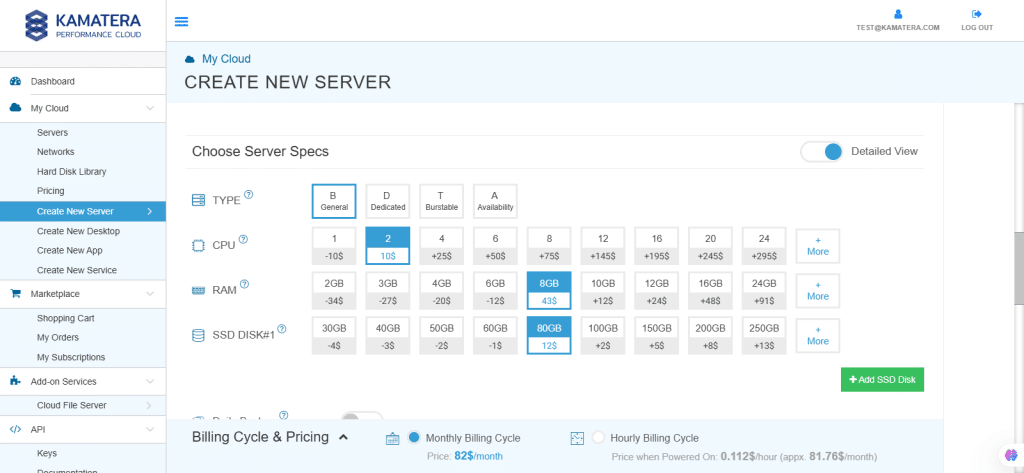
Choose Server Specs
| Field | Description |
| Type | Type B-General Purpose: Server CPU are assigned to a dedicated physical CPU thread with reserved resources guaranteed.
Type D–Dedicated: Server CPU are assigned to a dedicated physical CPU Core (2 threads) with reserved resources guaranteed. Type T-Burst: Server CPU are assigned to a dedicated physical CPU thread with reserved resources guaranteed. Exceeding an average usage of 10% will be extra charged for CPUs usage consumption. Type A-Availability: Server CPUs are assigned to a non-dedicated physical CPU thread with no resources guaranteed. Note: More information on CPU types is available on the My Cloud- Pricing page. |
| CPU | Choose the number of vCPUs that will be installed on the server. Type B/T can be configured with up to 104 vCPUs per server. Based on Intel’s latest Xeon Processors, 2.7 GHz+. |
| RAM | Choose the amount of RAM that will be installed on the server. Type B/T/D can be configured with up to 512GB RAM per server. |
| NVMe SSD DISK | Choose NVMe SSD storage size. You can add up to 15 NVMe SSD Disk. NVMe SSD storage includes unlimited IOPS and unlimited storage bandwidth, free of charge. |
| Daily Backup | Toggle the switch to enable extended daily backups of your server’s storage to external backup storage. |
| Management Services | Toggle the switch to enable managed services to the server’s operating system by Kamatera’s Technical Support Team. |
7. Choose Networking
Users can select the network they wish to use, whether it’s a public Internet network or a private local network.
Simple Mode
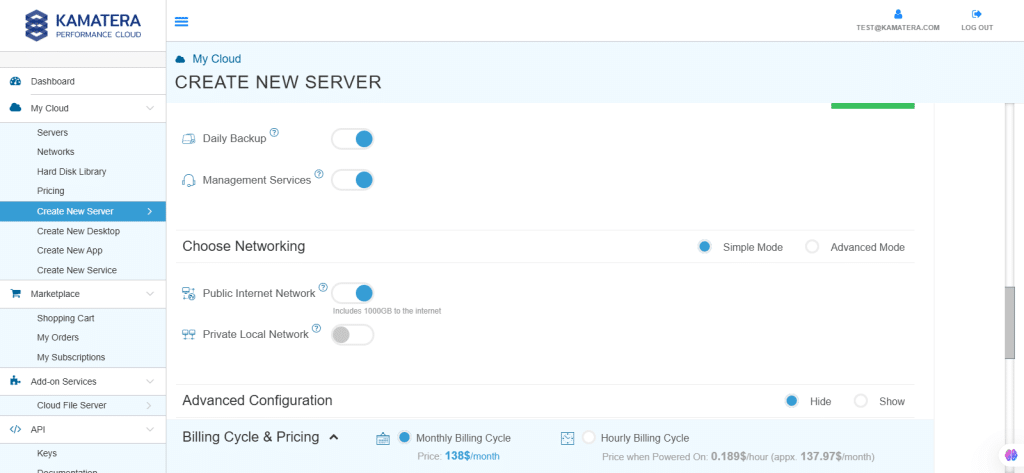
| Field | Description |
| Public Internet Network | Check to connect the server to a network interface connected to Public Internet Network. |
| Private Local Network | Check to connect the server to a network interface connected to Private Local Network. |
Advanced Mode
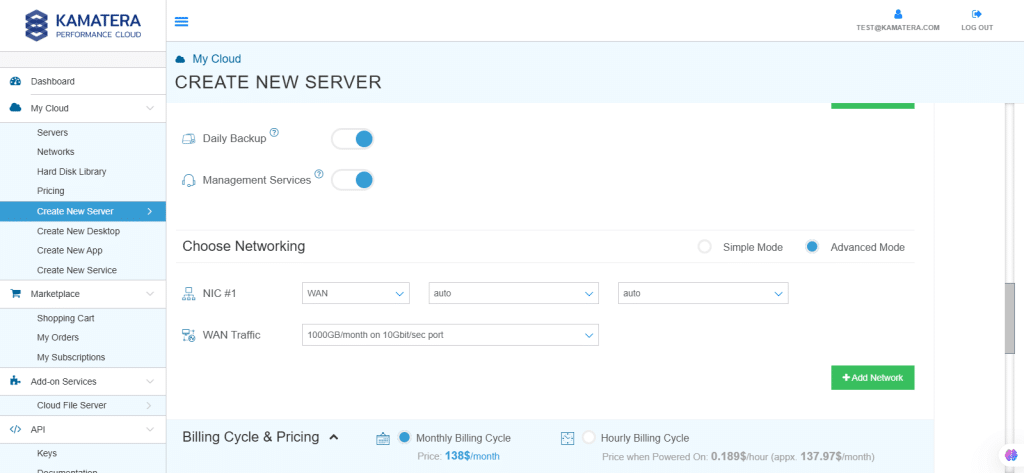
| Field | Description |
| NIC #1 | Select WAN from the options available in the drop-down menu.
Select auto from the options available in the drop-down menu.
Select auto from the options available in the drop-down menu.
|
| WAN Traffic | Select 5000 GB per month/ on 10 Gbit per second port. |
8. Advanced Configuration
Hide: to hide the advanced configuration.
Show: to see the advanced configuration.
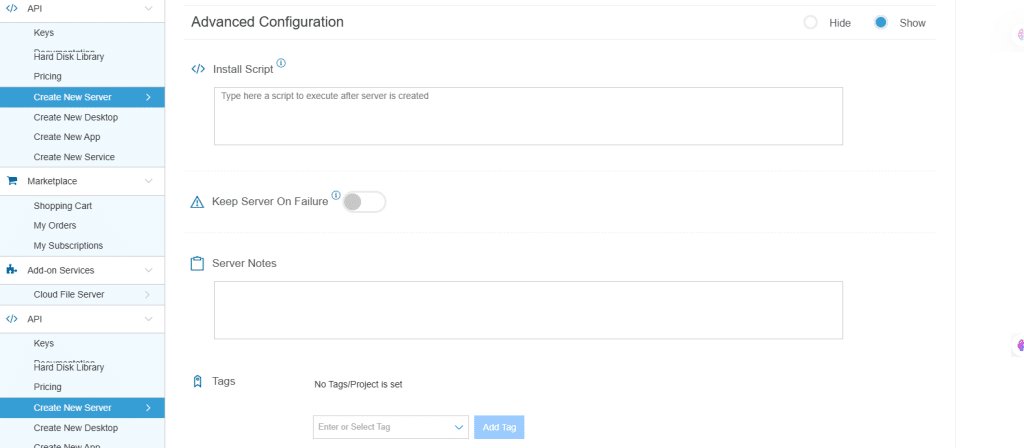
| Field | Description |
| Install Script | Enter the script here to execute once the server is created.
Note:For Windows system use Power Shell. |
| Keep Server On Failure | Do not terminate server if start up script or provisioning fails |
| Server Notes | Enter any server notes to be noted. |
| Tags | Select the tags from the drop-down menu and click Add. |
9. Finalize settings
Finalize settings by setting the password, re-validating it, selecting the number of servers, specifying the server name, and enabling the Power On Servers option.
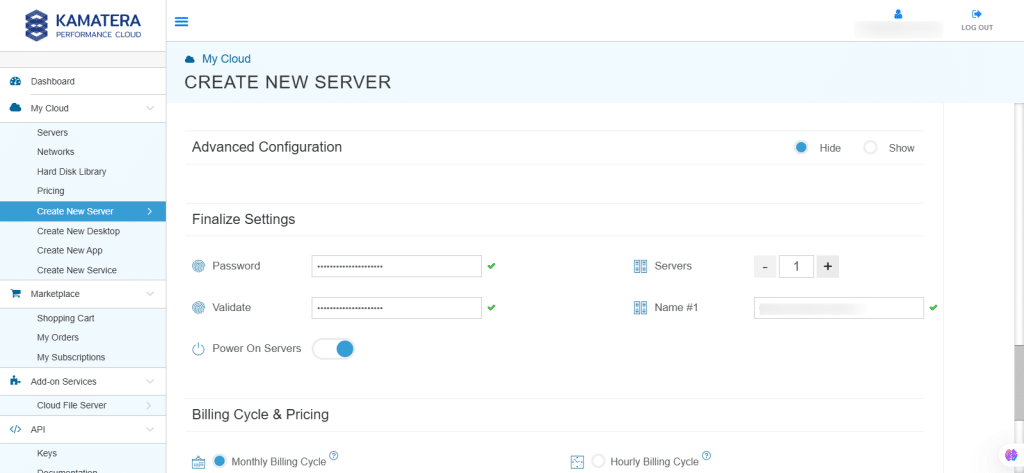
| Field | Description |
| Password | Select password
Password allowed characters: a-z, A-Z,0-9 !@#$^&*()~ and must need the following requirements:
|
| Validate | Re-enter the password to validate. |
| Servers | Select the number of servers the user wants. |
| Name # 1 | Enter the name of the server. |
| Power On Servers | Switch on the toggle button to see the details |
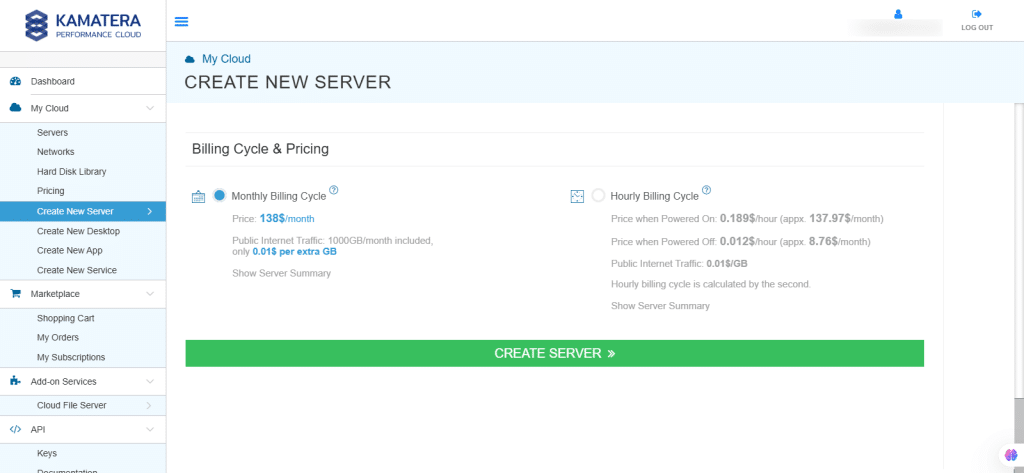
10. Billing Cycle and Pricing
The user can choose between monthly billing cycle and hourly billing cycle.
Note: The Server Summary displays the location, operating system (including server specifications), add-on services, servers, and pricing.
Click Create Server.
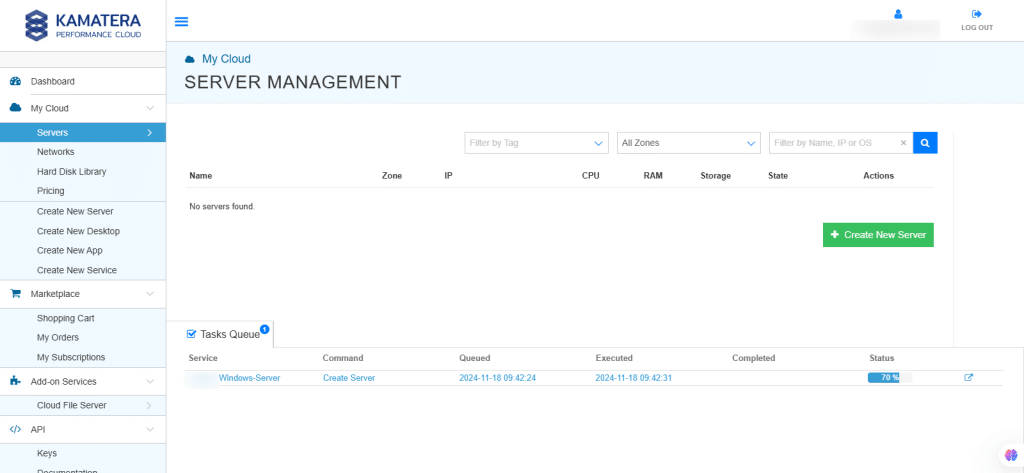
11. Click on Tasks Queue to see the progress of installation of Windows Server.
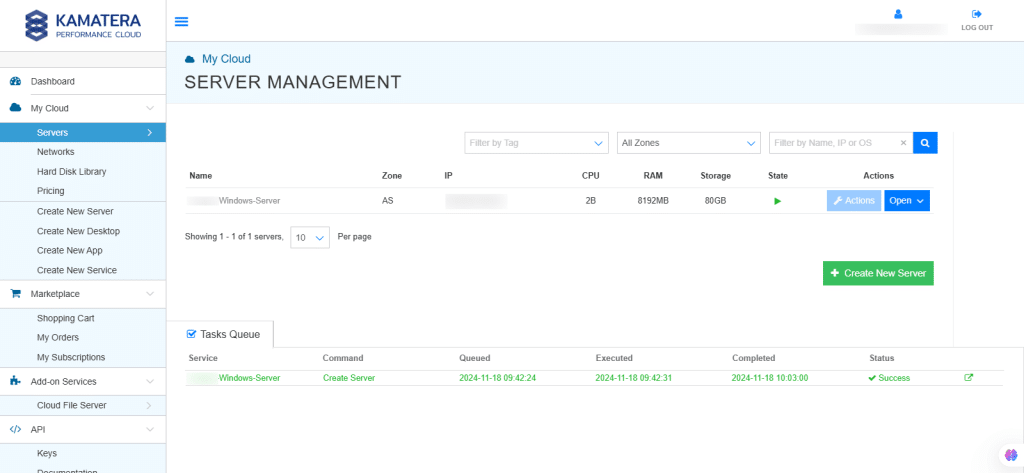
12. The server will be created and will appear on the Server Management screen. Once the server is created, click Open.
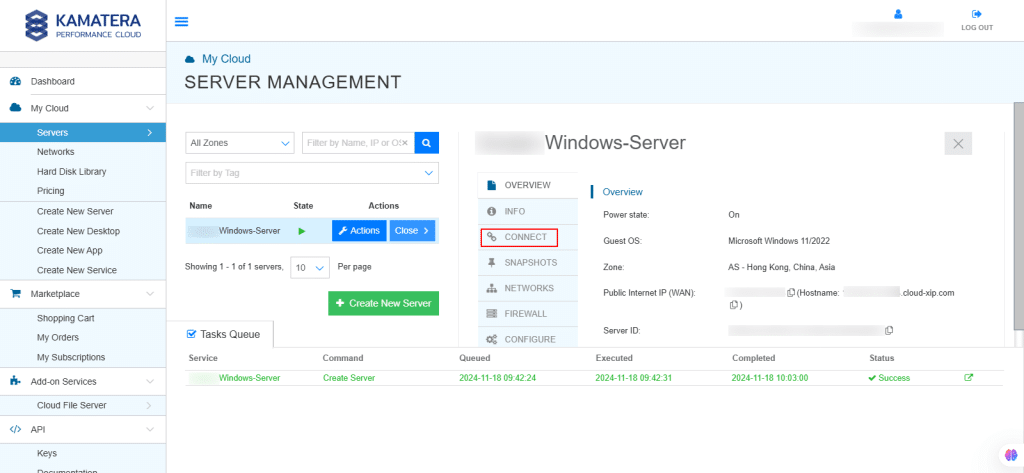
13. A new screen shows up. Overview tab in the center is selected by default and it displays information like Power state, Guest OS, Zone, Public Internet (WAN), Server ID of the server and Configuration-Number of CPU. Memory Size, Disk 1.
Click on Connect to connect to Windows Server.
14. Connection credentials like Connection Type, Username, and Password are shown. Now, click on Open Remote Console.
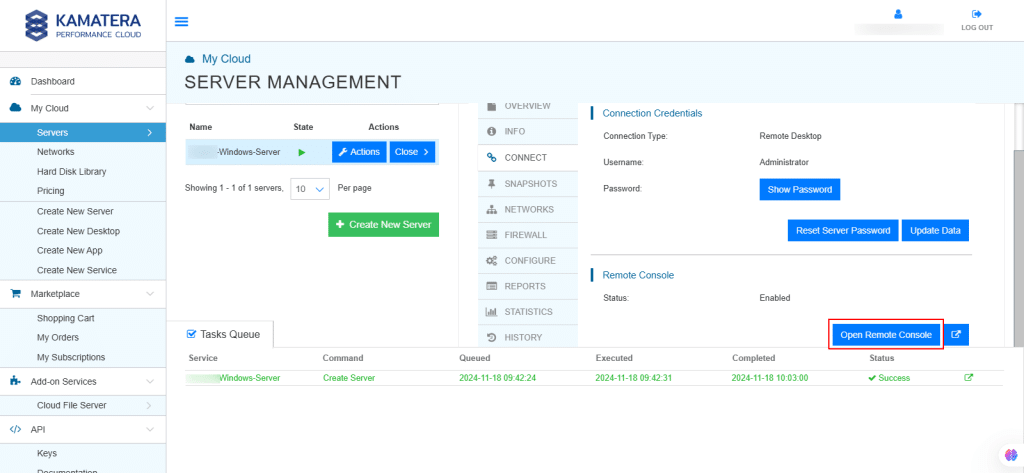
15. A new tab opens, connecting to the new server and displaying the Server Manager Dashboard.
Install phpMyAdmin using XAMPP
Installing phpMyAdmin on Windows will be easy by using XAMPP, which contains everything needed for phpMyAdmin. They also allow you to set up an Apache webserver. We recommend temporarily disabling your antivirus protection during installation, as active security software may interfere with the setup process and cause unexpected issues.
To turn off Microsoft Defender SmartScreen on Windows Server,
- Open Windows search bar and enter Reputation-based protection,
- Toggle off “Check apps and files” and “Potentially unwanted app blocking”.
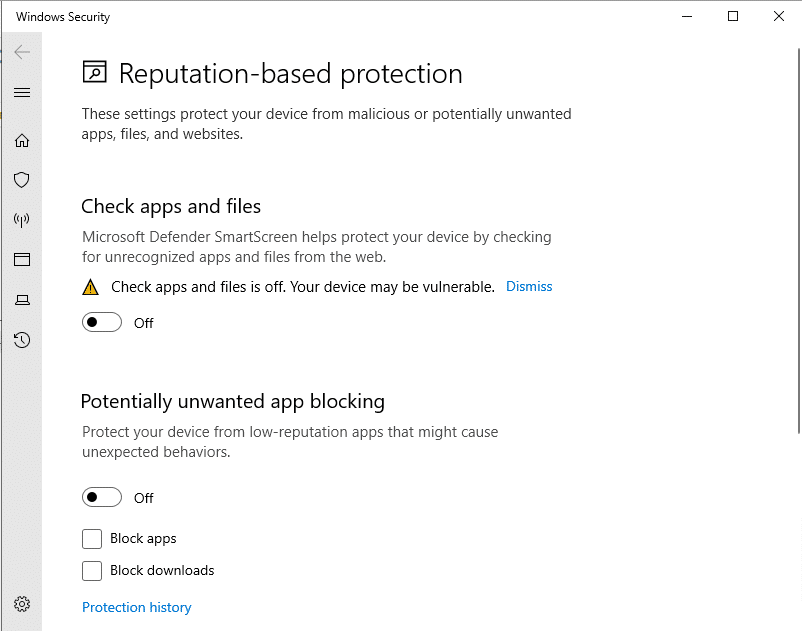
2. We suggest temporarily disabling User Account Control (UAC) before installation, as its protective restrictions on C: drive write permissions can interfere with XAMPP’s setup process.
In the Windows search bar,
- Enter UAC and select Change User Account Control settings.
- Drag the slider down to Never Notify.
- Click OK and confirm the changes.
- Restart your computer for the changes to take effect.
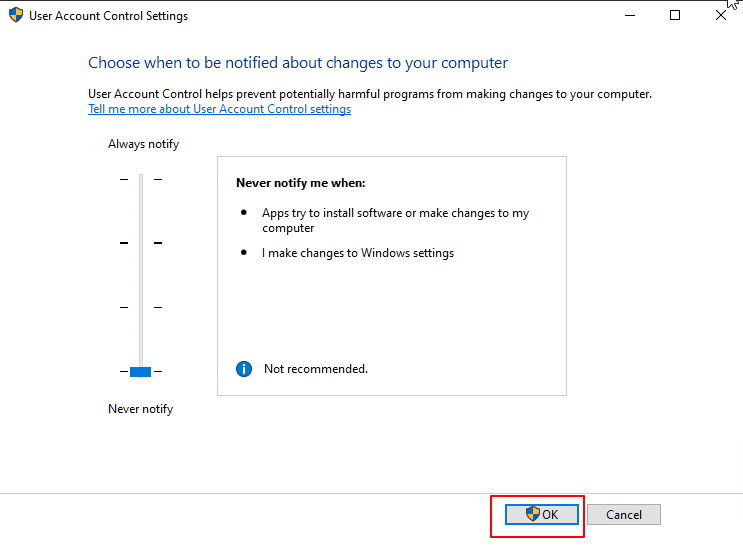
3. Open a browser and enter https://www.apachefriends.org/index.html to download the latest version of XAMPP from the official website.
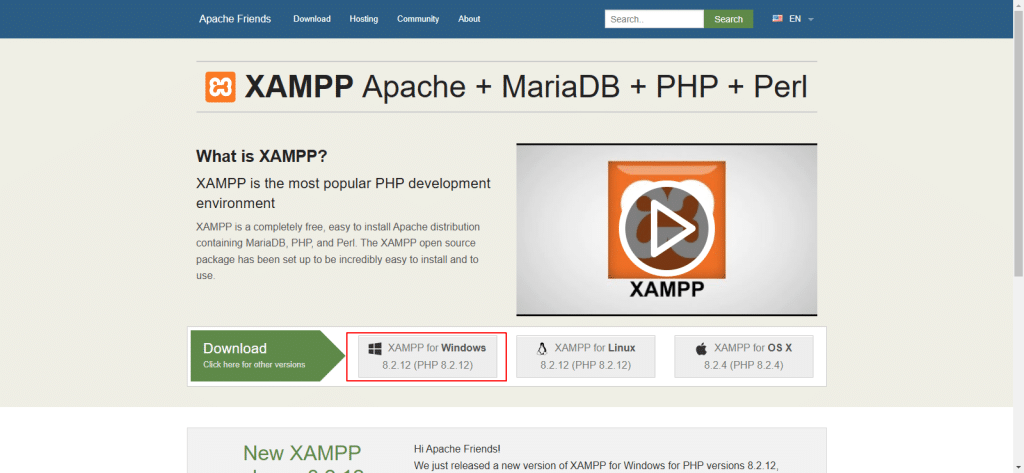
4. After the download is complete, click on Open file.
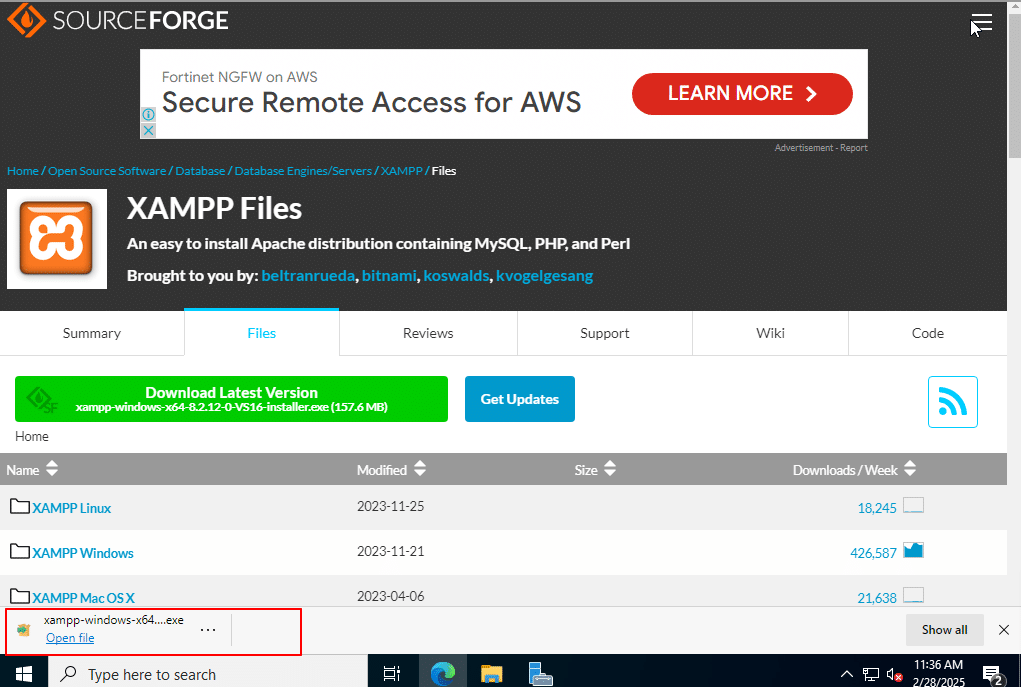
5. Click on Run.
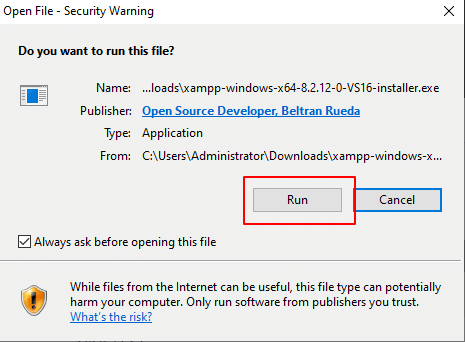
6. Click on Ok.
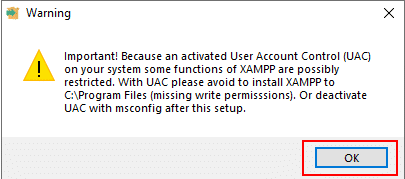
7. XAMPP set up wizard window opens, click Next.
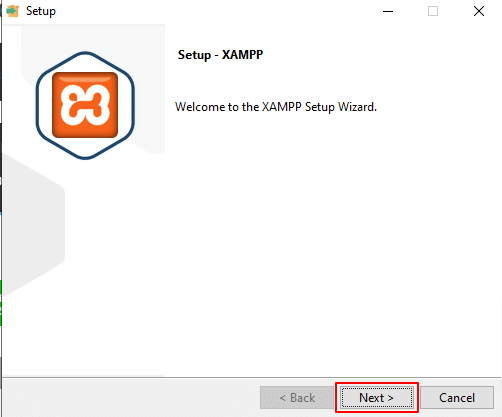
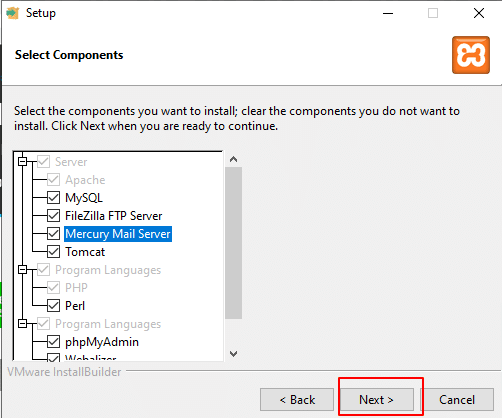
8. Select the components you want to install and click Next.
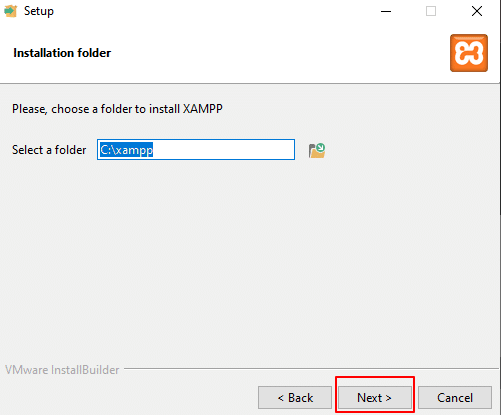
9. Select the folder and click Next.
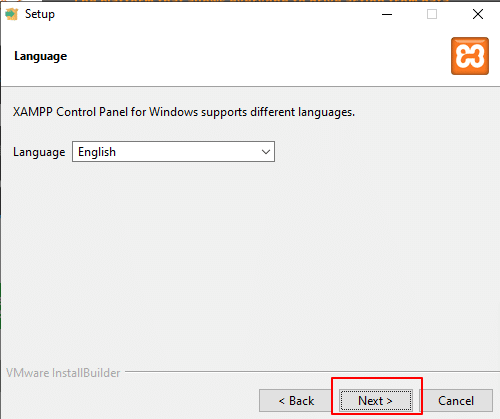
10. Select the language and click Next.
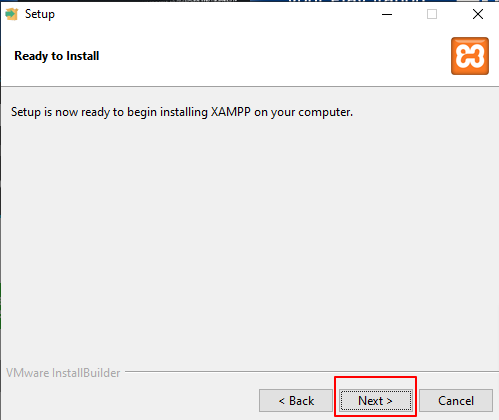
11. Click Next.
12. After the installation is completed, click Finish.
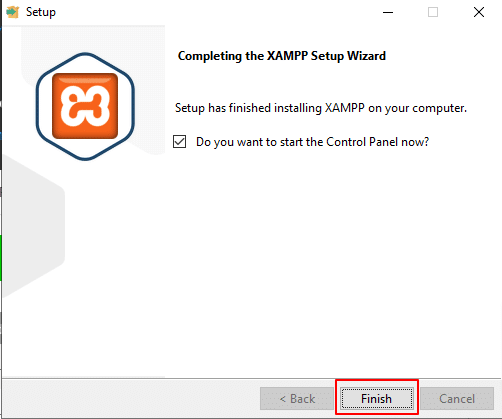
13. Now, XAMPP Control Panel shows up.
Using the XAMPP Control Panel, you can access individual components of your test server. It’s clear user interface logs all actions and allows you to start or stop specific modules. Additionally, the XAMPP Control Panel provides various other buttons, including:
- Config: allows you to configure the XAMPP as well as the individual components, adjusting settings like ports and memory limits.
- Netstat: shows all running processes on the local computer to monitor connections and troubleshoot port conflicts.
- Shell: Access a UNIX shell for executing scripts and managing databases.
- Explorer: Open the XAMPP folder in Windows Explorer for quick access to files.
- Services: Check and manage background services like Apache and MySQL.
- Help: Get links to user forums and documentation for support.
- Quit: Close the XAMPP Control Panel and stop all active services.
To install the Apache service, under Module Service, click the red cross mark next to Apache, and when the pop-up window appears, click Yes.
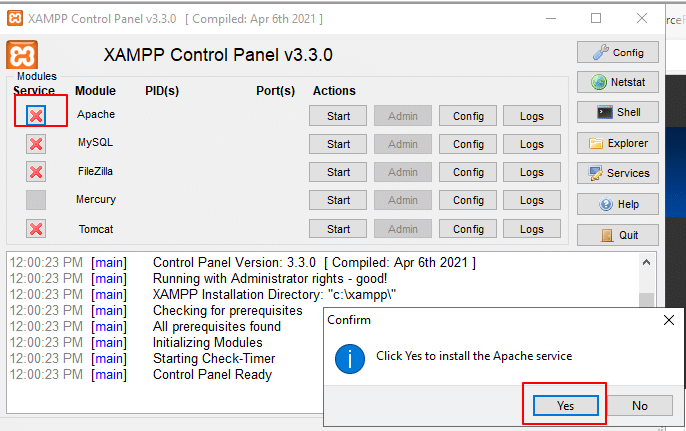
Now, you can see Apache service is installed (green tick mark under Module Service).
14. Similarly, to install the MySQL service, under Module Service, click the red cross mark next to MySQL, and when the pop-up window appears, click Yes.
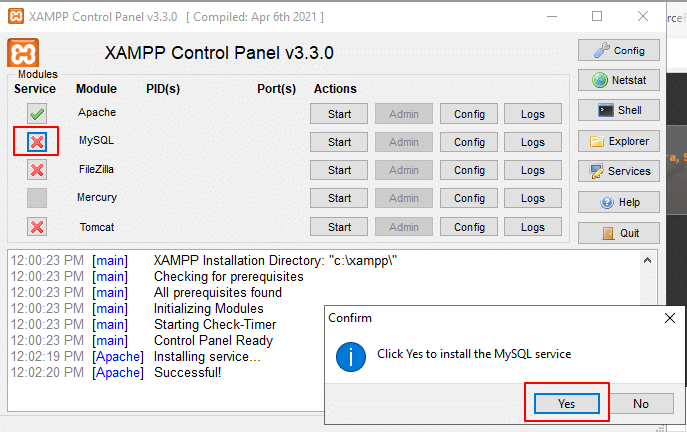
You will see MySQL service is installed (green tick mark beside MySQL).
15. Click Start button beside Apache.
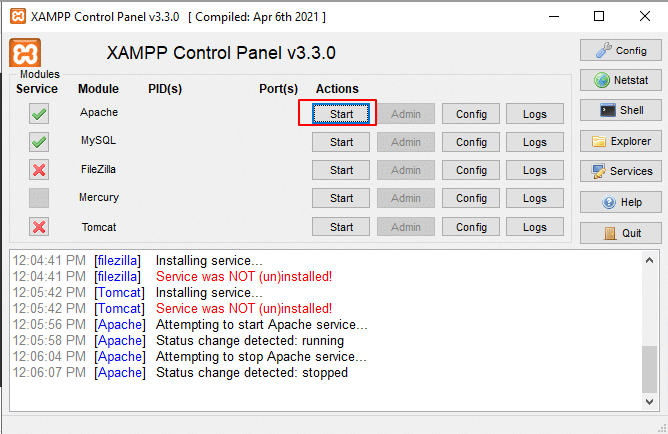
At the bottom, you will see “Attempting to start Apache service”, followed by the status “Running.”
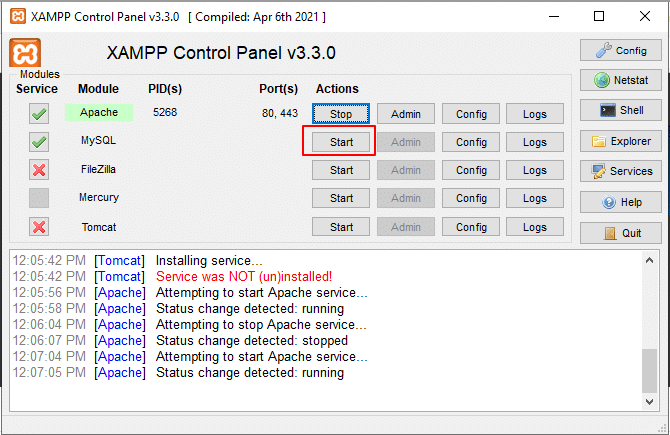
16. Now, click Start button beside the MySQL.
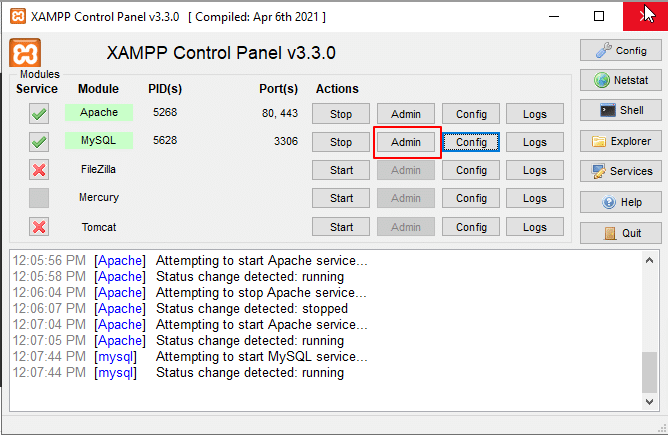
17. Click on Admin (as shown in the screen below) beside MySQL. It will navigate to phpMyAdmin web interface.
PhpMyAdmin
- PhpMyAdmin provides a visual interface for various tasks, such as creating, browsing, and editing tables.
Let’s explore its key features:
- On the upper left side of the page, you can see the list of databases which the current user has access to.
- On the right side of the screen in the Database Server section, you can see information about your MySQL server.
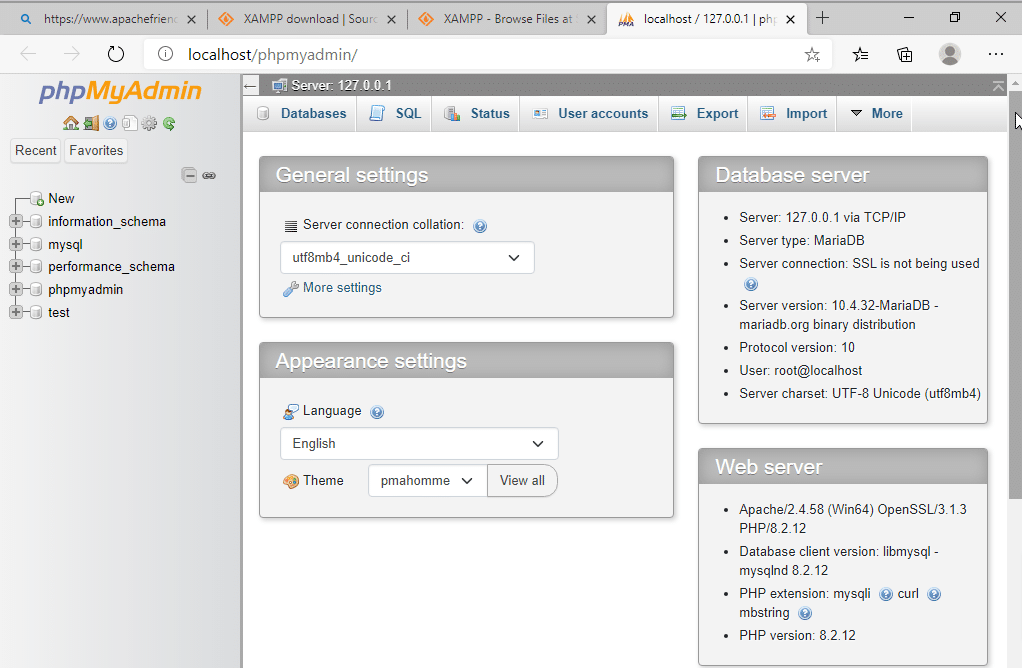
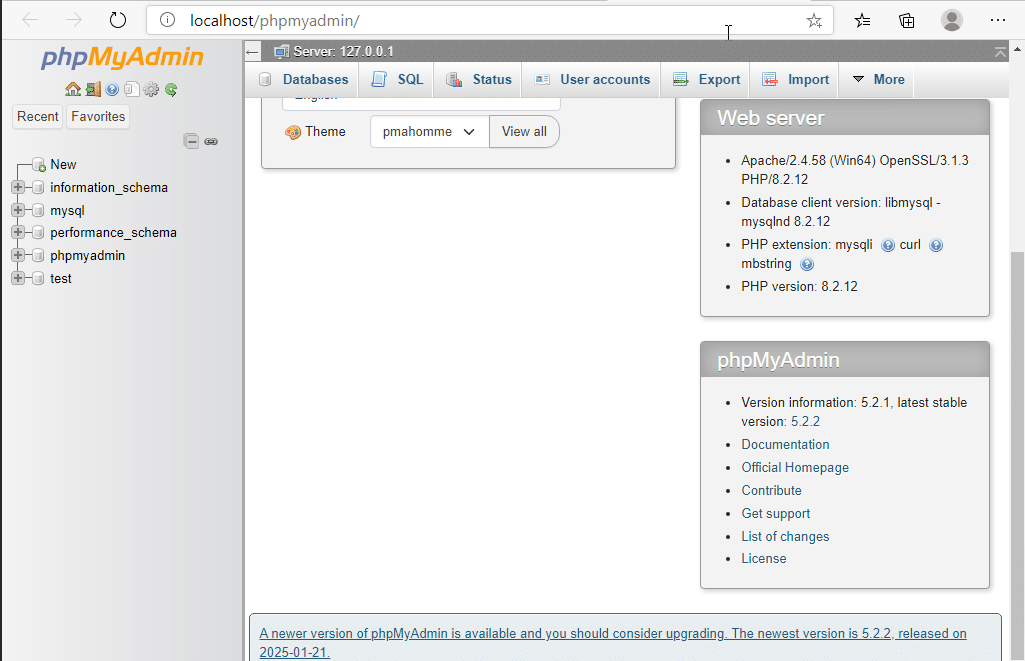
Below that, you can also see the information about Web Server (MySQL client you have) and phpmyadmin (version) you are currently running.
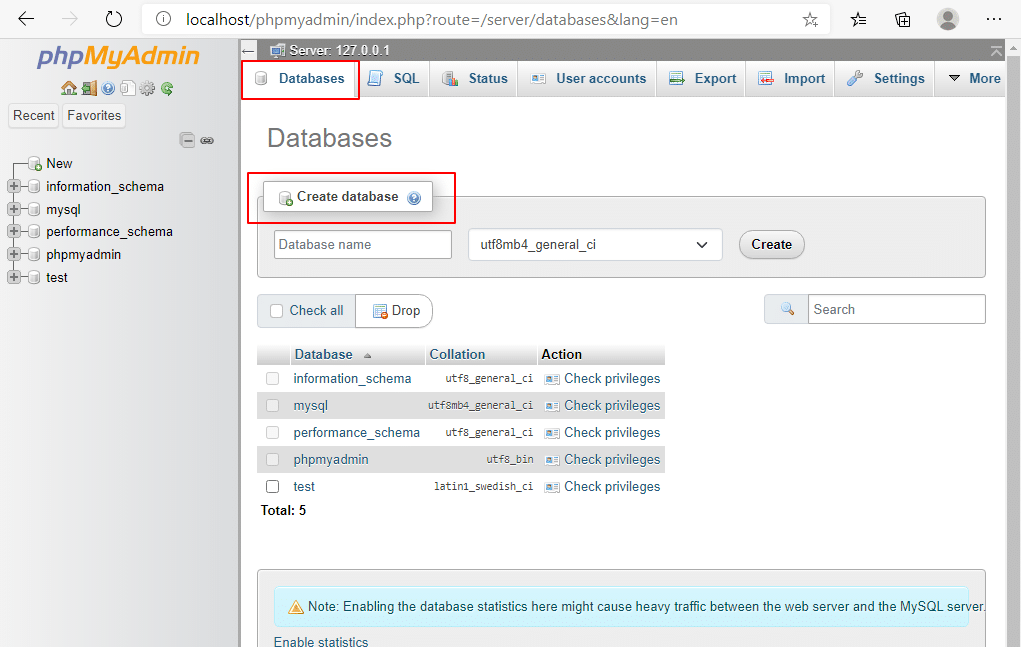
2. Databases: On top of the screen, when you click on the Databases tab, you can find the list of all available databases which can be managed. Click on any database to control it.
Create database: Click on Create database and enter the database name (ex: testphp). Click on Create.
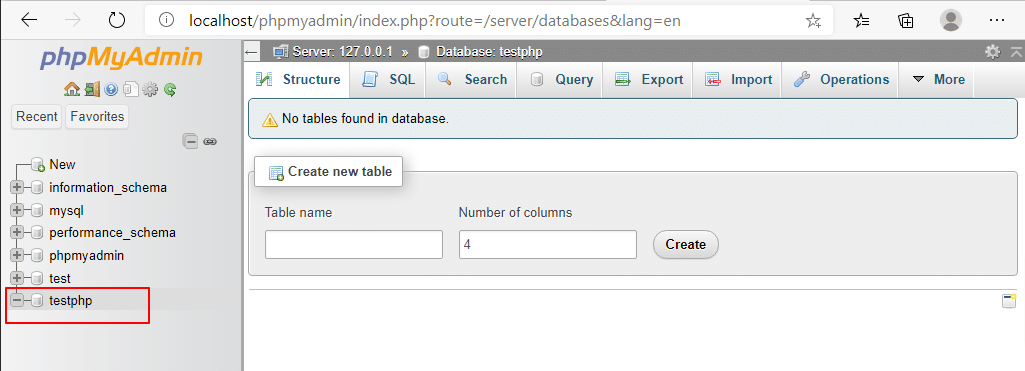
You can see the database is created as shown in the screen below.
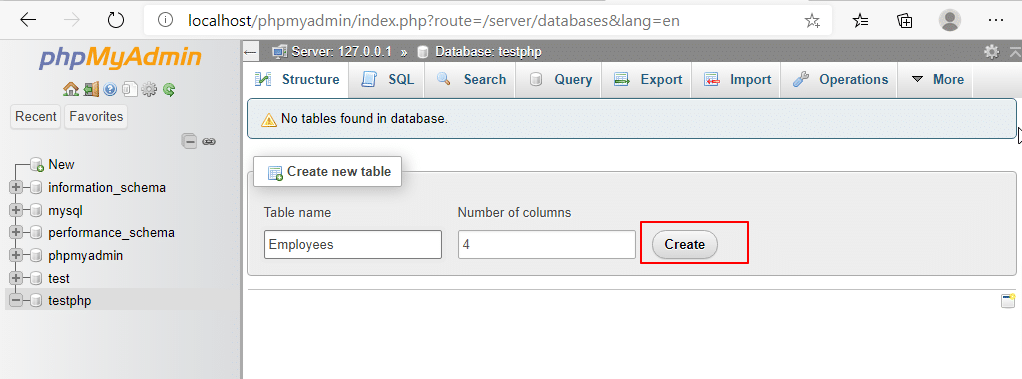
3. Create new table: Click on Create new table and enter the Table name (ex: Employees) and Number of columns. click Create.
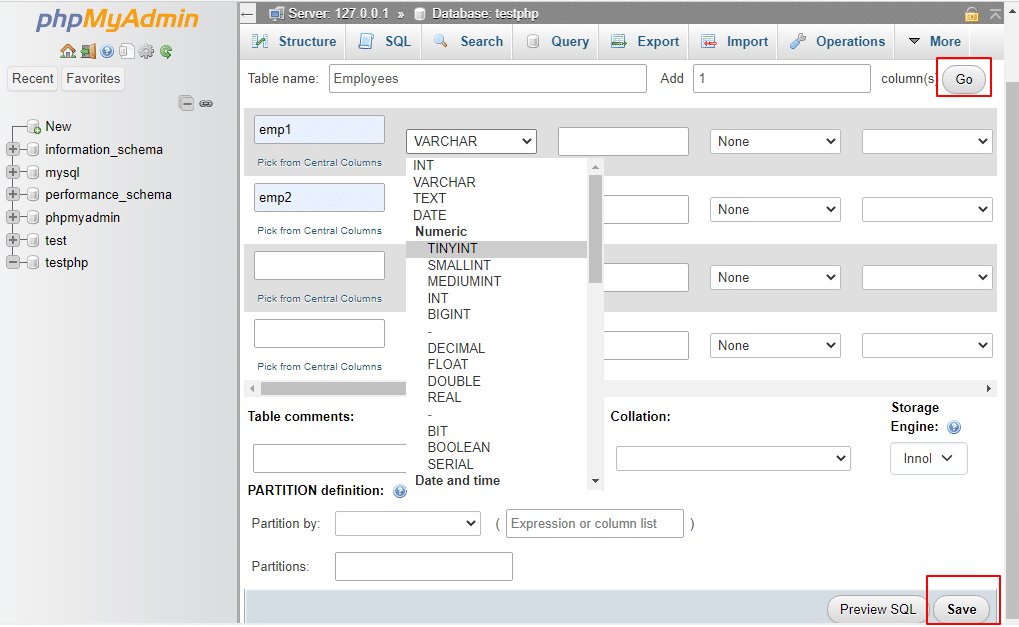
To add values to the table, enter the employee names in the Name field and select the appropriate data type under the Type field (e.g., INTEGER, VARCHAR, etc.) from the drop-down menu. Click Save to update the changes, then click Go.
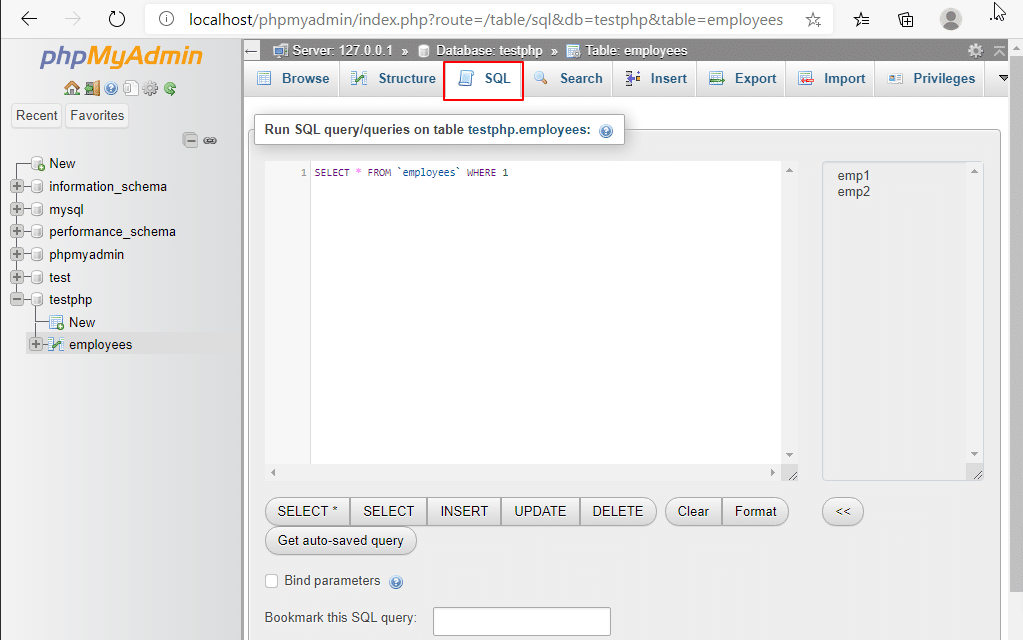
4. SQL: On the top of the screen, click the SQL tab. From here, you can run MySQL queries.
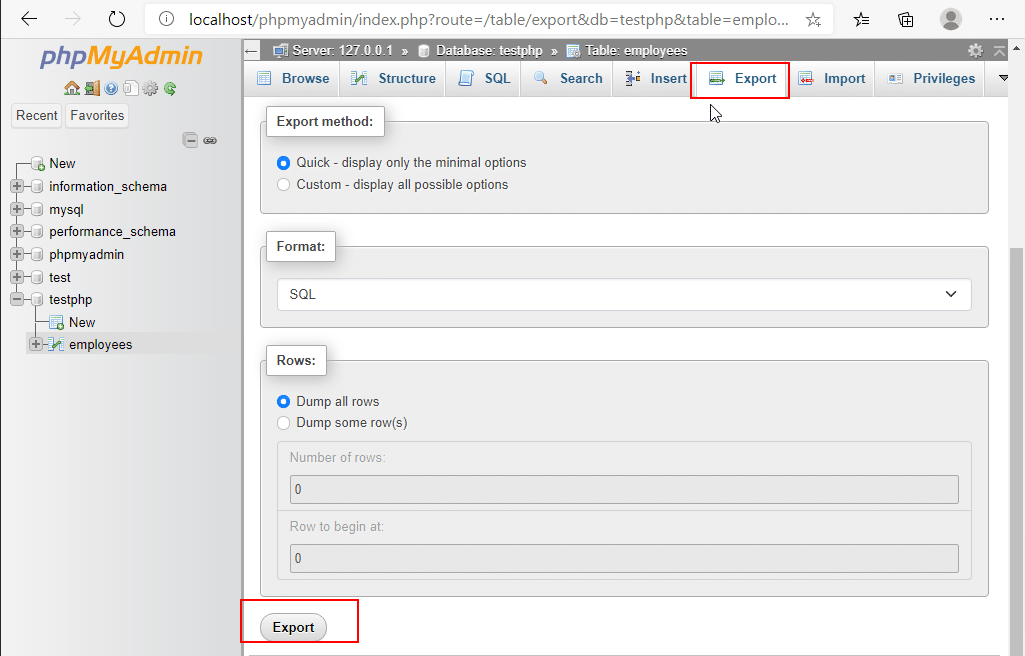
5. Export: On the top of the screen, click on the Export tab. This is used to export your table. Select the Export method, and the Format from the drop-down and then click Export.
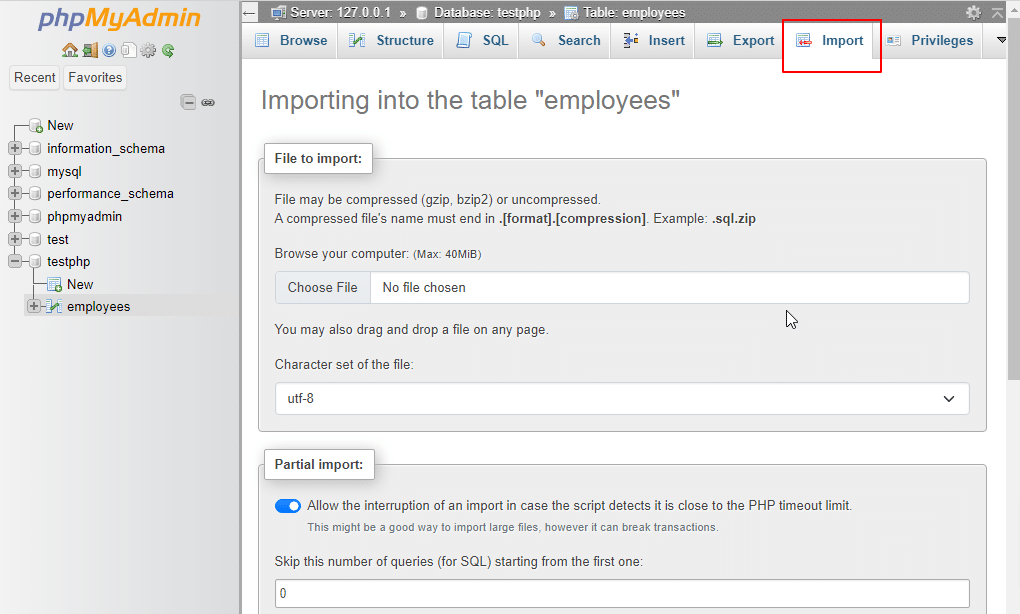
18. Import: On the top of the screen, click on the Import tab. It is used to import files into your database and are saved locally.
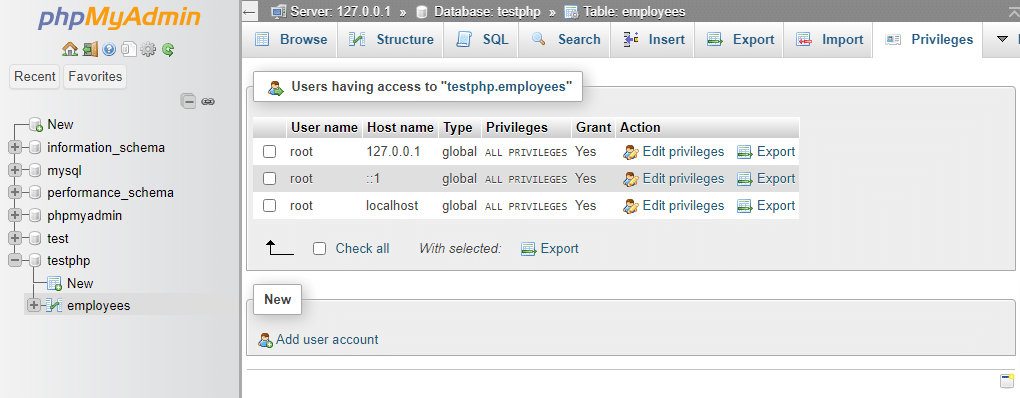
19. Privileges:By clicking on the Privileges tab, you can create new accounts, edit permissions as desired.
20. Operations: By clicking on the Operations tab, you can configure phpMyAdmin the way you would like to use it.
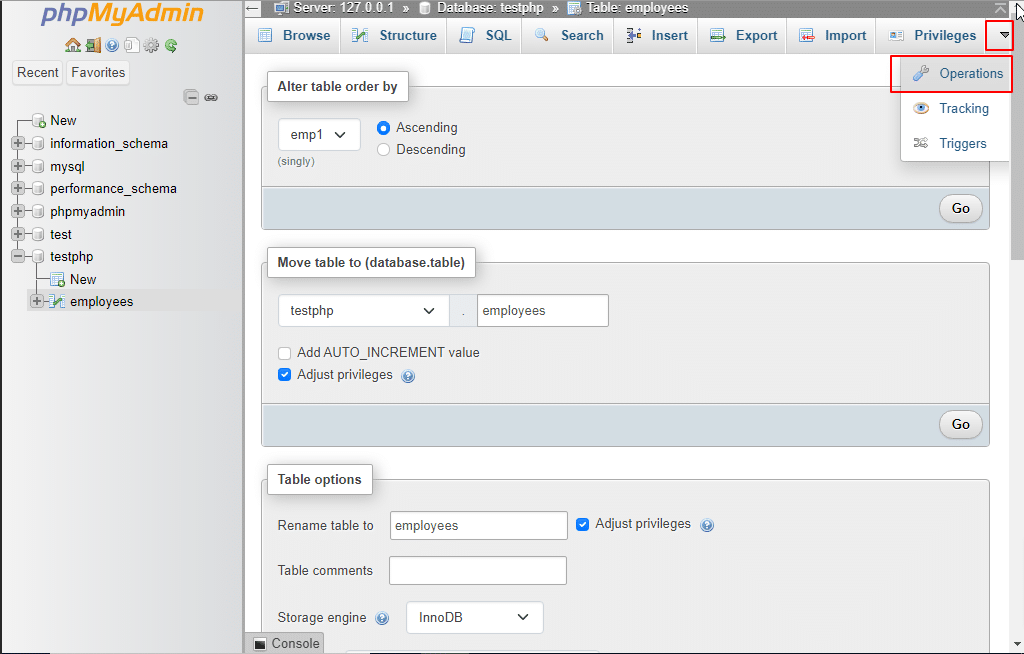
- Empty the table (TRUNCATE): Use the Empty button to remove all the data contained in a table without deleting the table.
- Empty the table (DELETE FROM): It removes rows from the table with a WITH clause to define common table expressions accessible within the DELETE.
Delete the Table (DROP): Use the Drop button to delete a table, and it deletes the whole table and all the records stored in the table.
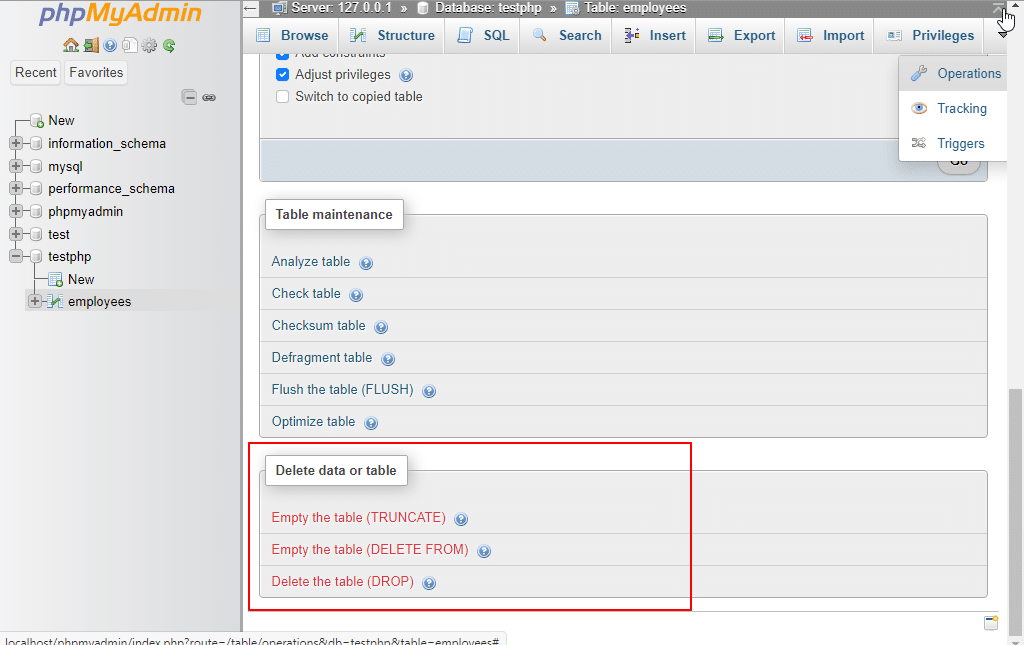
21. Search: The Search tab can be used to generate a search query for the chosen table.
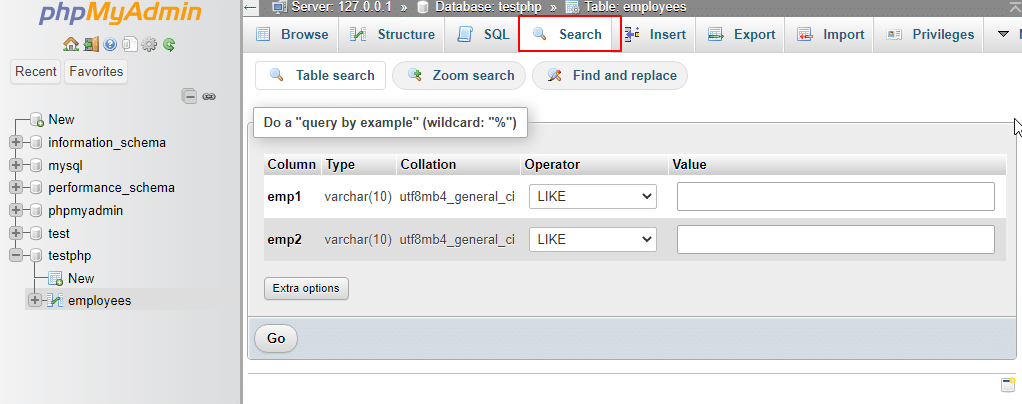
22. Structure: By clicking on the Structure tab, a new page will open that shows the database table’s structure and choose the operation you would like to execute.
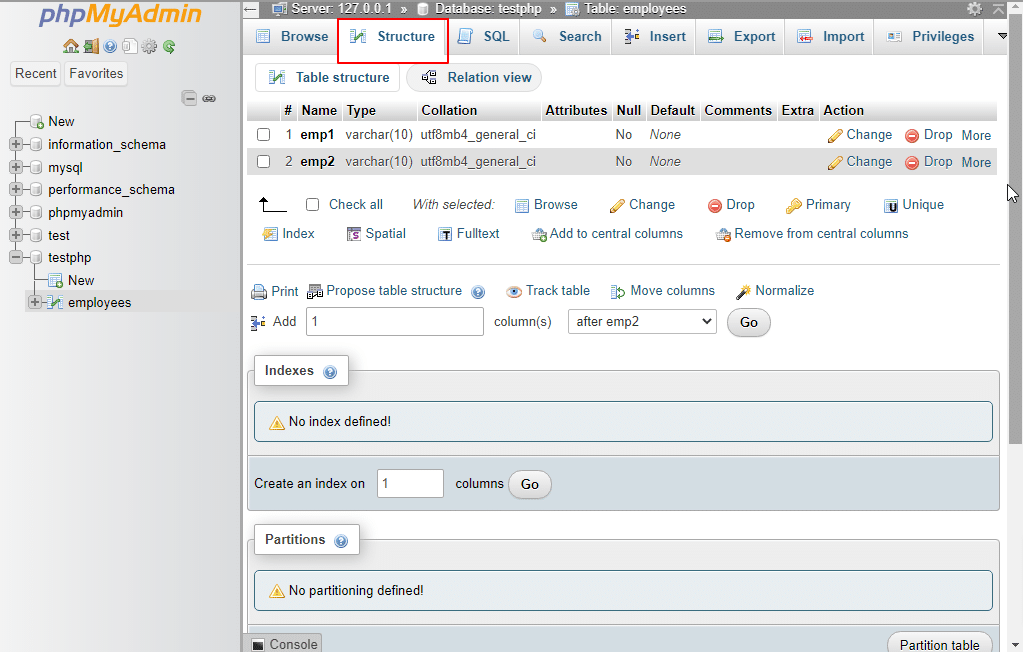
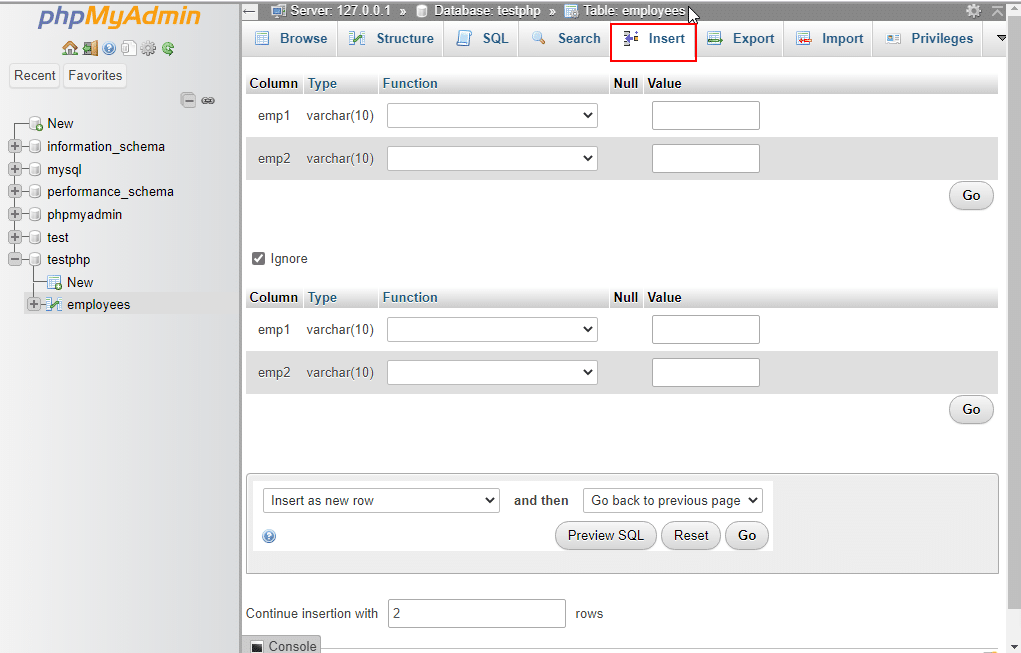
23. Insert: Use the Insert tab, to add more rows and columns to the tables in MySQL server and click Go.
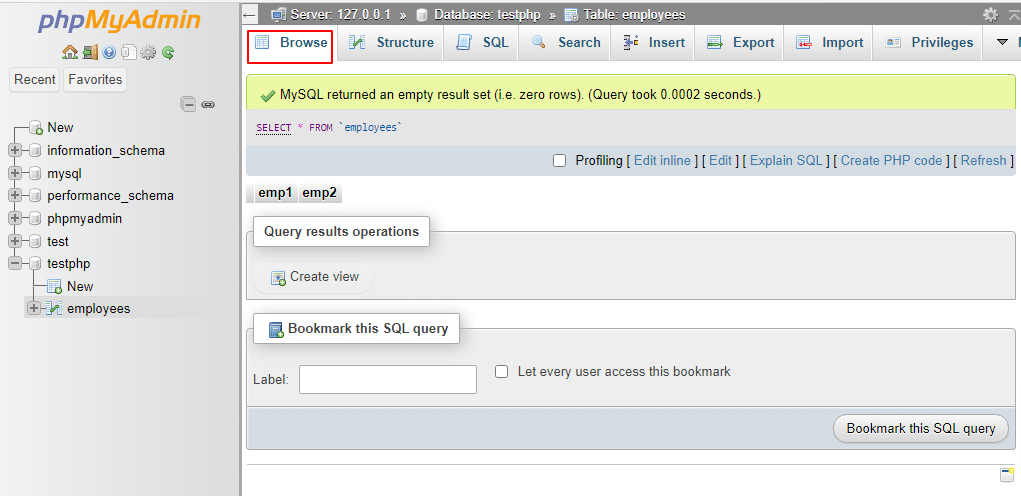
24. Browse: The Browse option allows you to view the data stored in a table. It displays records in a tabular format, making it easy to read, edit, or delete entries.
Congratulations! You have now successfully configured phpMyAdmin, giving you flexibility, efficiency, and control over your databases.
