


Caddy is a modern web server and reverse proxy that is designed to be secure by default and easy to use. Unlike traditional web servers, Caddy simplifies web hosting with automatic HTTPS, a user-friendly configuration file (Caddyfile) and built-in features like static file serving, reverse proxying, and compression.
With cross-platform support, Caddy runs seamlessly on Windows, Linux, macOS, and Docker. It automatically provisions SSL/TLS certificates via Let’s Encrypt making secure web hosting effortless. Using a Caddyfile (configuration file), you can easily set up websites and proxies. Since it is written in Go programming language, Caddy is both memory-efficient and fast.
Caddy is ideal for developers, system administrators, and businesses looking for a hassle-free and secure web server. Its automation and minimal configuration make it a great choice for hosting websites, APIs, and microservices.
Kamatera offers a pre-configured Caddy server image that allows users to quickly set up and deploy their web applications. This guide will walk you through the steps to install and configure Caddy on Kamatera, ensuring a smooth and secure web hosting experience.
First, let’s create an account on Kamatera.
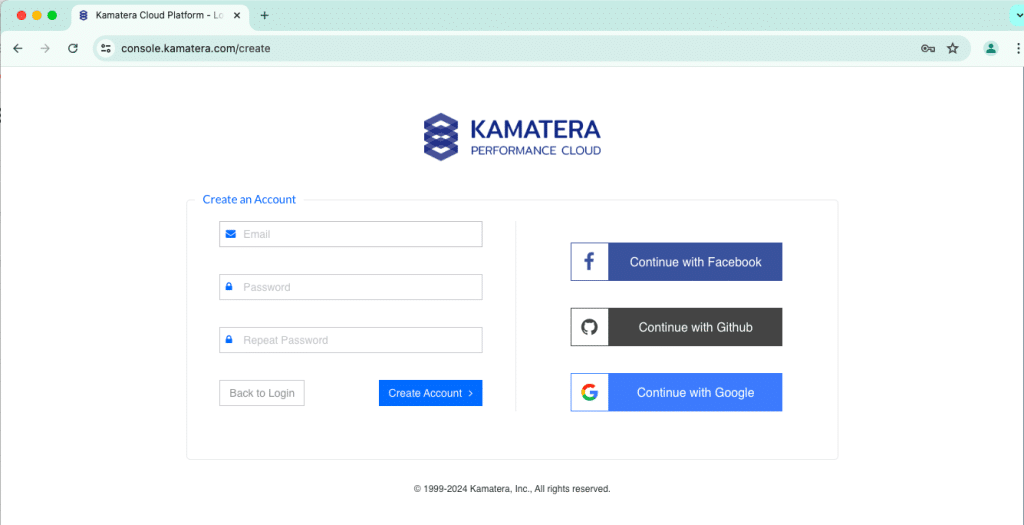
Go to console.kamatera.com and sign up for an account by providing the following information:
- Verify Your Email: Click the verification link sent to your email by Kamatera.
- Password: Enter your password.
- Repeat Password: Re-enter your password and click Create Account.
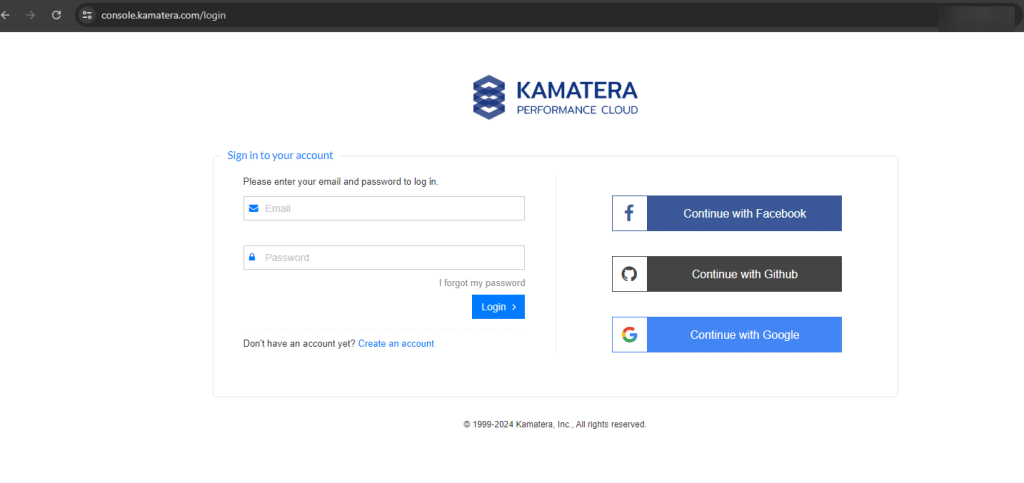
Access the Kamatera Management Console
- Enter your username and password and click Login to access the management console.
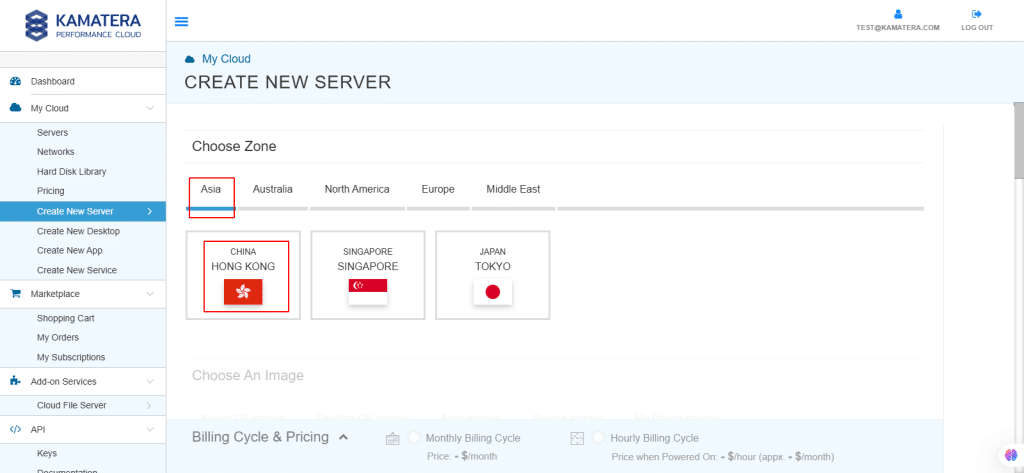
2. Navigate to My Cloud on the left pane, select Servers, and click on Create New Server. Alternatively, you can click on Create New Server on the right pane.

3. Choose Zone
Choose a zone from the following options:
- Asia
- North America
- Europe
- Middle East
Note: For this setup, we used the Asia server domain to set up the Windows Server.
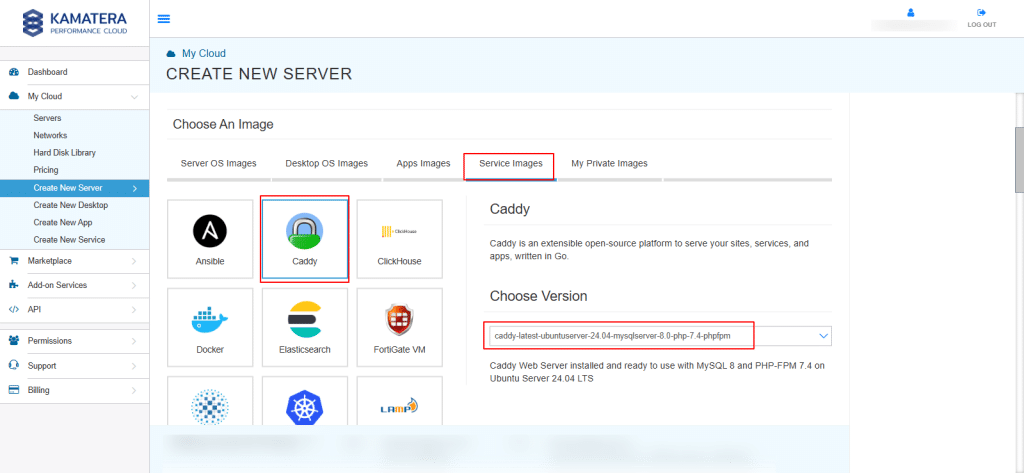
4. Choose an image
Kamatera offers a variety of app and server images to help users set up preconfigured resources. Users can explore options such as:
- Server OS Images
- Desktop OS Images
- App Images
- Service Images
- My Private Images
In this case, select Service Images and select Caddy.
Under Choose Version, select the latest version of Caddy.
Note: Always choose the latest version for the best features and security updates.
Once the version is selected you will see the following message:
“Caddy Web Server installed and ready to use with MySQL 8 and PHP-FPM 7.4 on Ubuntu Server 24.04 LTS”.
5. Toggle the Detailed view button to enable you to view the detailed description, including the price.
Note: For this use case, the following server specifications are used. Select the server specifications based on your requirements.
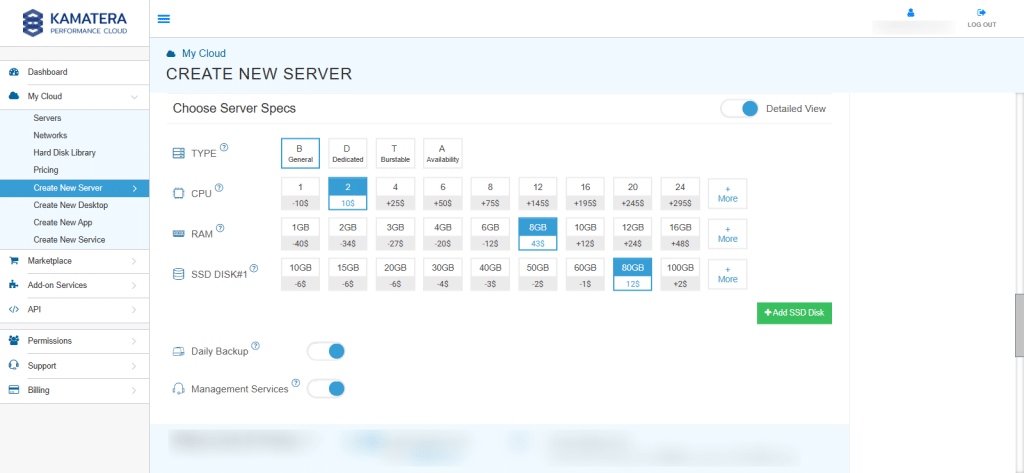
Choose server specs
| Field | Description |
| Type | Type B-General Purpose: Server CPU are assigned to a dedicated physical CPU thread with reserved resources guaranteed.
Type D–Dedicated: Server CPU are assigned to a dedicated physical CPU Core (2 threads) with reserved resources guaranteed. Type T-Burst: Server CPU are assigned to a dedicated physical CPU thread with reserved resources guaranteed. Exceeding an average usage of 10% will be extra charged for CPUs usage consumption. Type A-Availability: Server CPUs are assigned to a non-dedicated physical CPU thread with no resources guaranteed. Note: More information on CPU types is available on the My Cloud-Pricing page. |
| CPU | Choose the number of vCPUs that will be installed on the server. Type B/T can be configured with up to 104 vCPUs per server. Based on Intel’s latest Xeon Processors, 2.7 GHz+. |
| RAM | Choose the amount of RAM that will be installed on the server. Type B/T/D can be configured with up to 512GB RAM per server. |
| NVMe SSD DISK | Choose NVMe SSD Storage Size. You can add up to 15 NVMe SSD Disk. NVMe SSD Storage includes unlimited IOPS and unlimited storage bandwidth, free of charge. |
| Daily Backup | Toggle the switch to enable extended daily backups of your server’s storage to external backup storage. |
| Management Services | Toggle the switch to enable Management Services to the server’s operating system by Kamatera Technical Support Team. |
6. Choose networking
Users can select the network they wish to use, whether it is a public Internet network or a private local network.
Simple Mode:
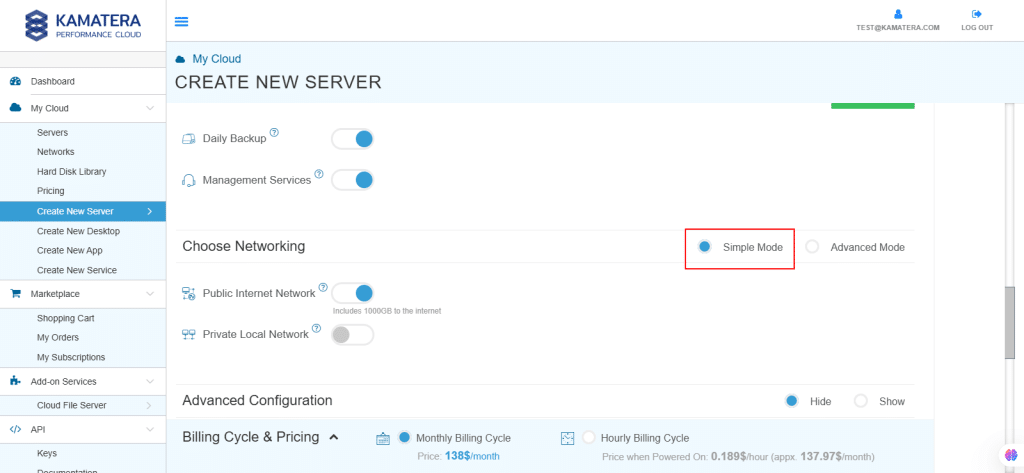
| Field | Description |
| Public Internet Network | Check to connect the server to a network interface connected to Public Internet Network. |
| Private Local Network | Check to connect the server to a network interface connected to Private Local Network. |
Advanced mode:
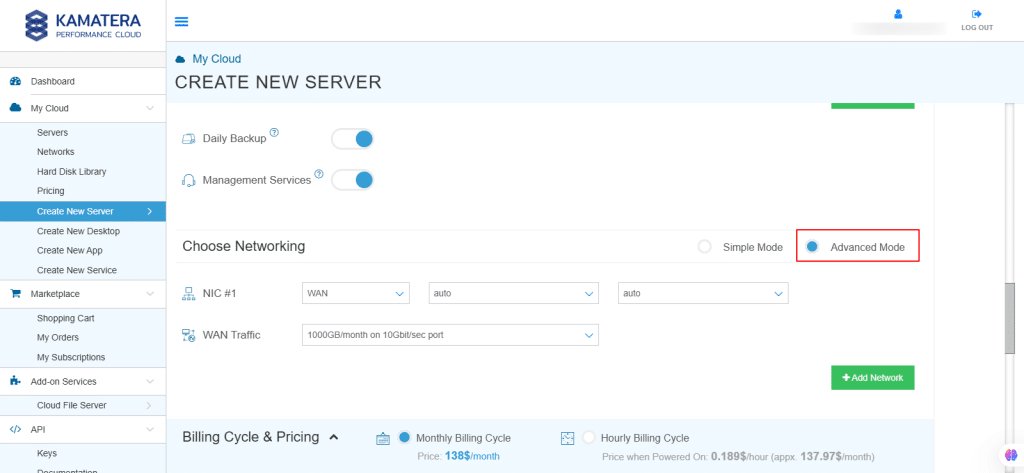
| Field | Description |
| NIC #1 | Select WAN from the options available in the drop-down menu.
Select auto from the options available in the drop-down menu.
Select auto from the options available in the drop-down menu.
|
| WAN Traffic | Select 5000 GB per month/ on 10 Gbit per second port. |
7. Advanced configuration
Hide: to hide the advanced configuration.
Show: to see the advanced configuration.
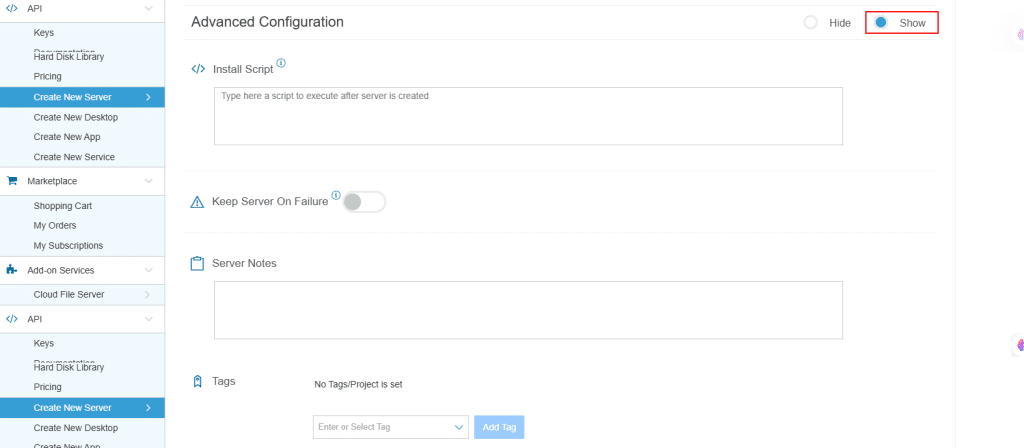
| Field | Description |
| Install Script | Enter the script here to execute once the server is created.
Note: For Windows system use Power Shell. |
| Keep Server On Failure | Do not terminate server if start up script or provisioning fails |
| Server Notes | Enter any server notes to be noted. |
| Tags | Select the Tags from the drop-down menu and click Add Tag. |
8. Finalize settings
Finalize settings by setting the password, re-validating it, selecting the number of servers, specifying the server’s name, and enabling the Power On Servers option.
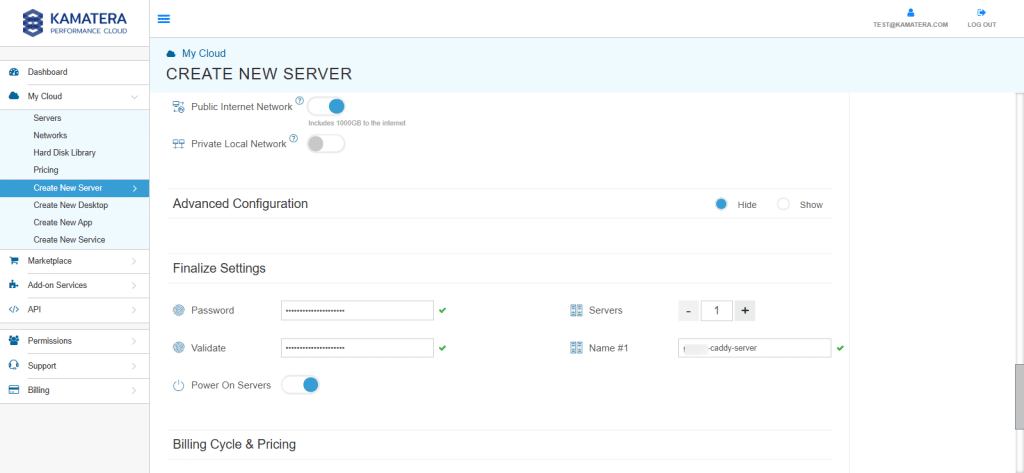
| Field | Description |
| Password | Select password
Password allowed characters: a-z, A-Z,0-9 !@#$^&*()~ and must need the following requirements:
|
| Validate | Re-enter the password to validate. |
| Servers | Select the number of servers the user wants. |
| Name # 1 | Enter the name of the server. |
| Power On Servers | Switch on the toggle button to see the details |
Note: Once the user enters the details in Finalize Settings, they can select monthly or hourly billing, depending on their requirements.
9. Billing cycle and pricing
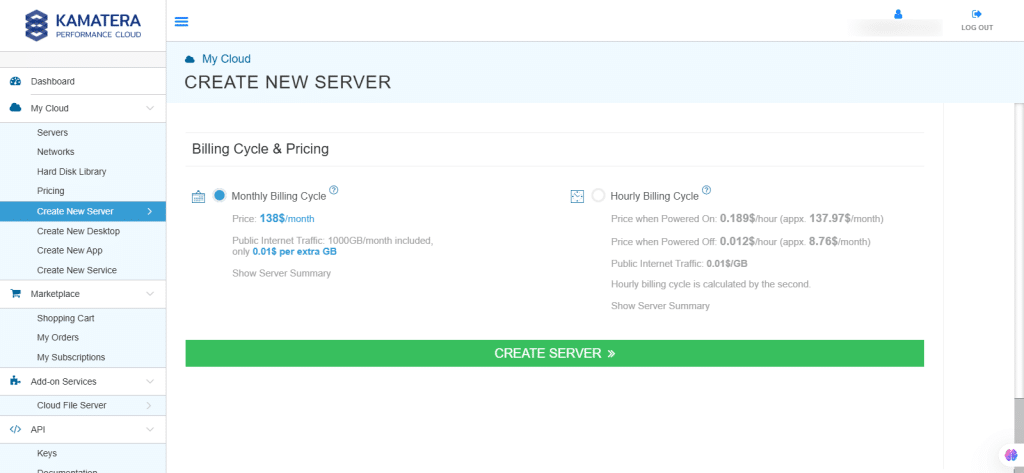
The user can choose between monthly billing cycle and hourly billing cycle.
Note: The Server Summary displays the location, operating system (including server specifications), add-on services, servers, and pricing.
Click Create Server.
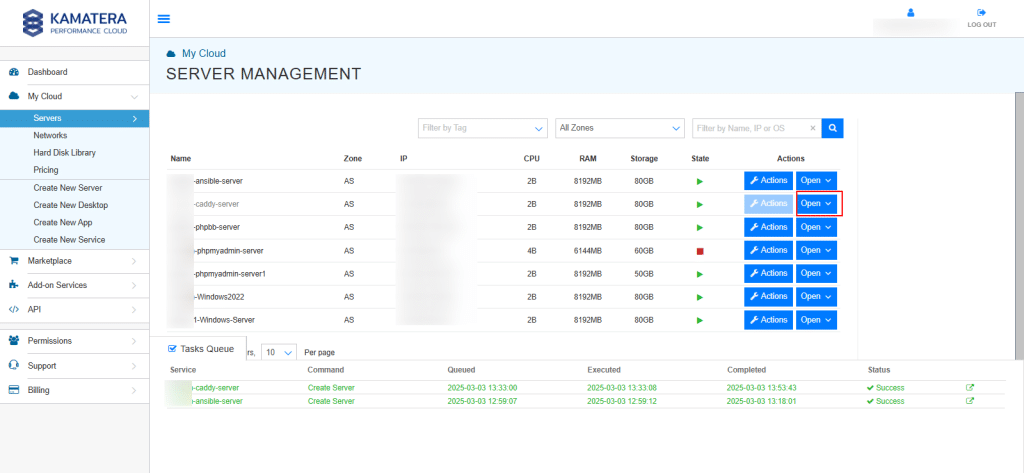
10. Click on the Tasks Queue at the bottom, you can see that Caddy is being downloaded.

11. Once the installation is successful, you will message as Success beside the server’s name and Caddy is reflected in the Server Management dashboard.
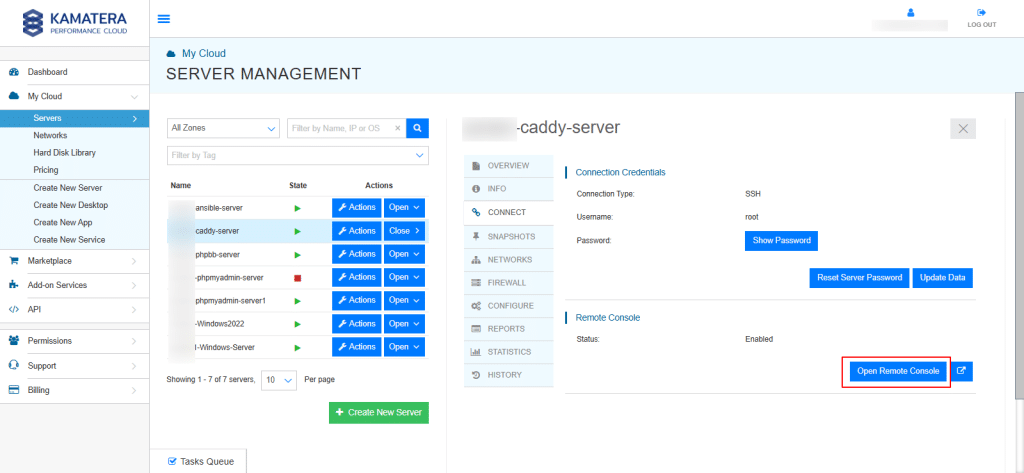
Click Open, beside the Caddy server.
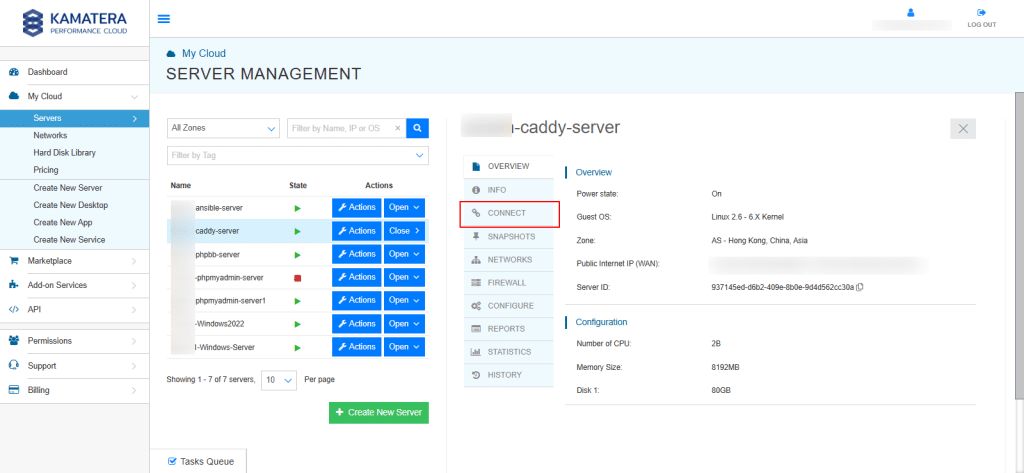
12. A new screen shows up, with the Overview tab in the center selected by default displays information like Power state, Guest OS, Zone, Public Internet (WAN), Server ID of the server and Configuration-Number of CPU. Memory Size, Disk 1.
Next, click on Connect to connect to the server.
13. Now, click on Open Remote Console.
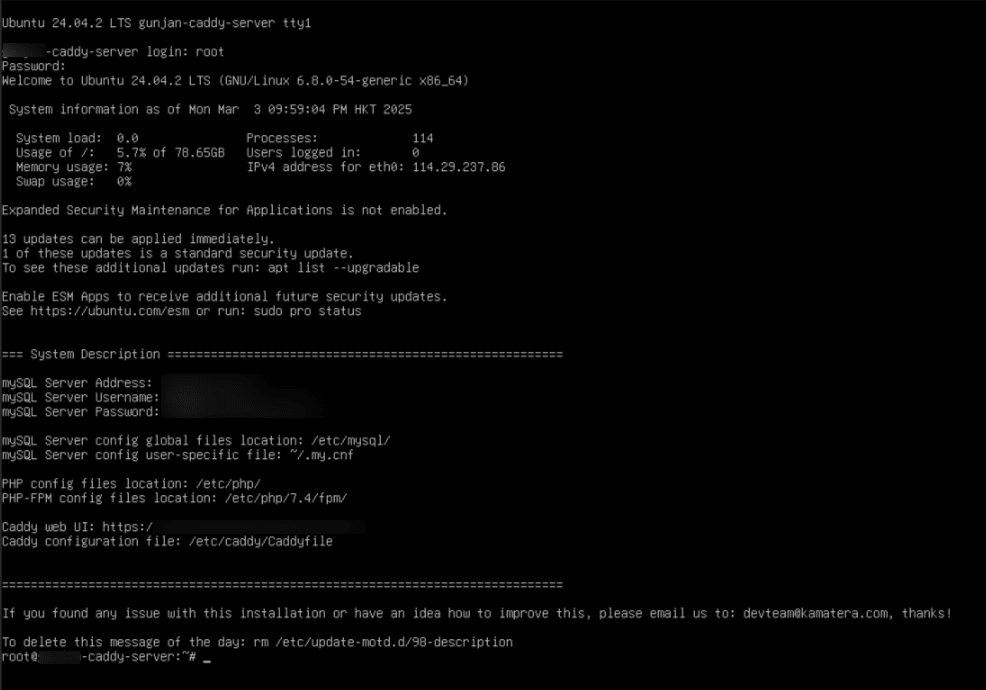
14. In the terminal, enter the username and password that you specified while creating the server (step-6).
Once logged in, the system displays the System Description, including:
mySQL Server Address, mySQL Server Username, mySQL Server Password, mySQL Server config files location, PHP config files location, Caddy WebUI and Caddy configuration file location.
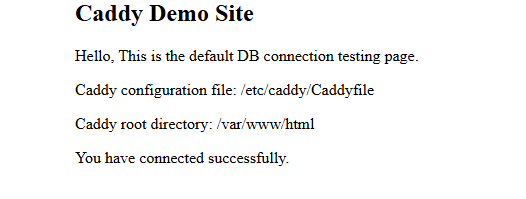
15. Open the browser and enter the Caddy Web UI URL: https://xx-xxx-xx-xxx.example.com (provided in step 14).
You will see the following message displayed on the screen.
16. You can find detailed documentation and guides on Caddy, including various methods for installing it on your system, at https://caddyserver.com/docs/.
17. To find out which version of Caddy is installed on your server, you can use the following command:
Command:
caddy version

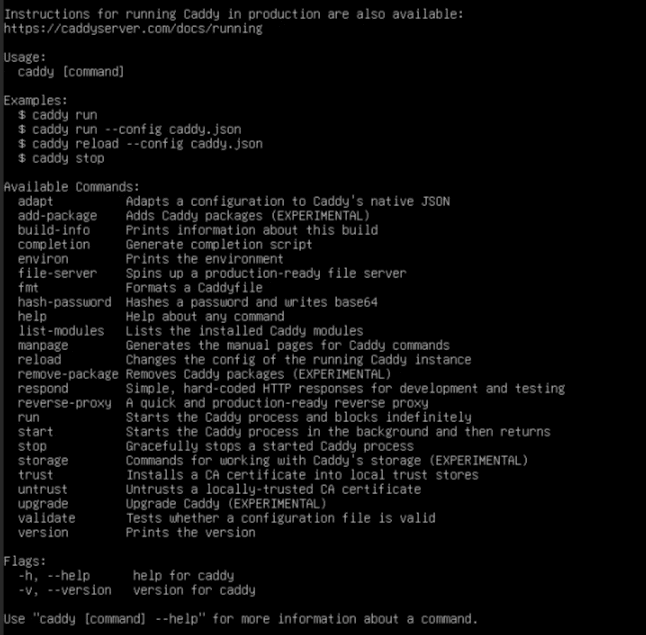
18. When you run Caddy without any arguments, it displays helpful information about the available commands and options. This is useful for learning how to use Caddy’s various features.
Command:
caddy
To see detailed usage of any command, you can run:
Command:
caddy help <command>
For example: caddy help run
19. Before manually running Caddy, check its status and stop it if necessary to avoid conflicts.
![]()
20. Use /etc/caddy/Caddyfile (given in step-14) as your Caddy configuration file because it is the default location, ensuring smooth service management, automatic loading, and easier maintenance.
Run the below command to edit the configuration file in Nano editor:
Command:
sudo nano /etc/caddy/Caddyfile

21. Below is the default configuration file used to generate the output when accessing the Caddy Web UI at: https://xx-xxx-xx-xxx.example.com (Step 15).
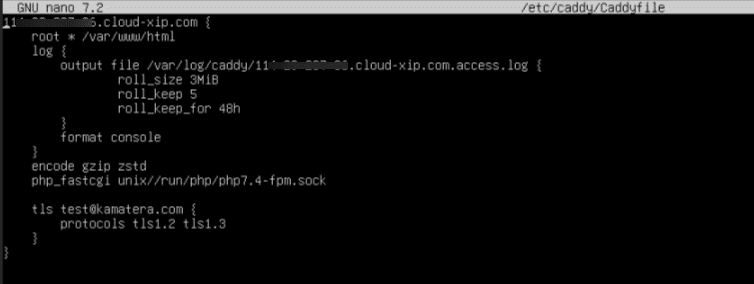
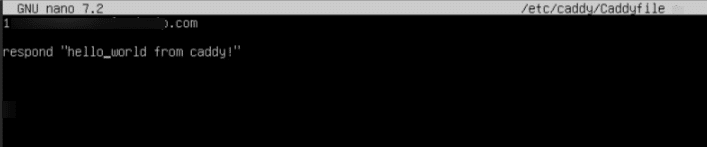
22. Modify the Configuration:
Inside the Caddyfile, add or update the following lines:
localhost
respond “hello world from caddy”
or, if you are using a domain/IP address, replace localhost with your server’s public IP or domain:
xxx-xx-xxx-xx.example.com
respond “hello world from caddy”
After editing, follow these steps to save the file:
- Press CTRL + X to exit Nano.
- Press Y to confirm saving changes.
- Press Enter to save and close the file.
23. After saving and closing the file, run the following command to start Caddy:
Command:
caddy start
This command starts the Caddy server in the background, allowing it to serve requests based on the configuration in the Caddyfile.

24. Now, open your browser and enter localhost or the Caddy Web UI URL: https://xx-xxx-xx-xxx.example.com (provided in Step 14) to view the changes made to the configuration file.

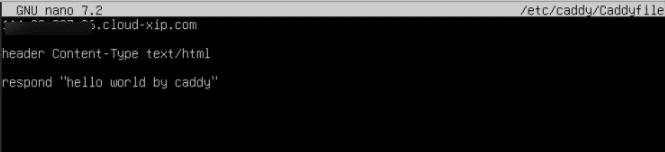
25. If you want Caddy to serve responses with the Content-Type header set to text/html, add the following line to your Caddyfile:
header Content-Type text/html
It ensures that the response is recognized as HTML by the browser.
After editing, follow these steps to save the file:
- Press CTRL + X to exit Nano.
- Press Y to confirm saving changes.
- Press Enter to save and close the file.
Whenever the config file is updated, always run the following command
Command:
caddy start
26. To check whether the response is an HTML file, follow these steps:
- Open the Browser and enter localhost or your Caddy Web UI URL https://xx-xxx-xx-xxx.example.com.
- Find an empty area on the page, right-click, and select Inspect from the menu.
- The Developer Tools panel will open. By default, it will be on the Elements tab, showing the rendered HTML structure of the page.
- If you see <html>, <head>, or <body> tags, it confirms that the response is in HTML format.

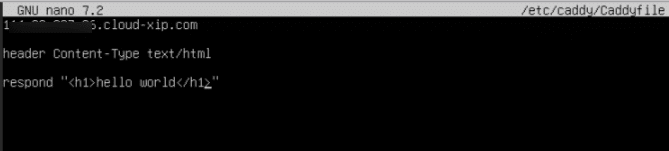
27. To format the text as a heading in Caddy’s response, you need to use the <h1> HTML tag inside the Caddyfile configuration. Here’s how to do it:
Inside the Caddyfile, add or update the following lines:
localhost
header Content-Type text/html
respond “<h1>hello world</h1>”
or, if you are using a domain/IP address, replace localhost with your server’s public IP or domain:
xxx-xx-xxx-xx.example.com
header Content-Type text/html
respond “<h1>hello world</h1>”
After editing, follow these steps to save the file:
- Press CTRL + X to exit Nano.
- Press Y to confirm saving changes.
- Press Enter to save and close the file.
Now, start the server by running the following command:
Command:
caddy start
28. Open the Browser and enter localhost or your Caddy Web UI URL https://xx-xxx-xx-xxx.example.com to see the updated changes.
The text will now appear as Heading 1.

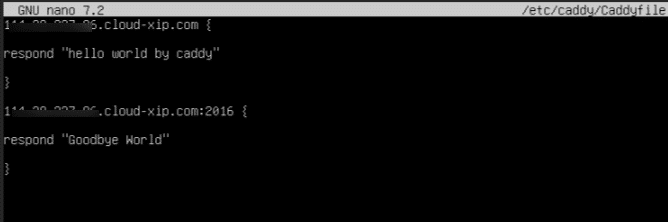
29. In Caddy, you can define multiple sites within a Caddyfile by grouping them inside curly braces {}. Each site block specifies a different domain or port and contains its own configuration.
For example, update your Caddyfile as follows:
localhost {
respond “Hello, world!”
}
localhost:2016 {
respond “Goodbye, world!”
}
- localhost – This block defines a site that runs on the default HTTP port (80). When you access http://localhost, Caddy will respond with “hello world by caddy”.
- localhost:2016 – This block defines another site running on port 2016. When you access http://localhost:2016, Caddy will respond with “Goodbye World”.
(or)xxx-xx-xxx-xx.example.com { respond “Hello, world!”} xxx-xx-xxx-xx.example.com:2016 { respond “Goodbye, world!”}
After editing, follow these steps to save the file:
- Press CTRL + X to exit Nano.
- Press Y to confirm saving changes.
- Press Enter to save and close the file.
Now, start the server by running the following command:
Command:
caddy start
30. The following command will start Caddy using the default Caddyfile (/etc/caddy/Caddyfile or Caddyfile in the current directory).
Command:
caddy run
It starts the Caddy server with the specified Caddyfile and runs Caddy in the foreground, meaning it stays active in the terminal until you stop it manually. This command is typically used when starting Caddy manually for debugging.
31. The following command will apply the latest changes in the Caddyfile without interrupting running services.
Command:
caddy reload
This command reloads the Caddy configuration without stopping the server and is used when you modify the Caddyfile and want to apply changes without restarting Caddy.
With Kamatera’s ready-to-use Caddy server image, setting up a server is quick and easy. By following this guide, you now have a working Caddy server ready to use.